Fresh salad leaves add flavor, nutrition, and color to everyday meals, but buying them regularly can be expensive and often involves plastic packaging. A bottle garden offers a simple, eco-friendly solution that allows you to grow crisp, pesticide-free salad greens right in your home kitchen. Even with limited space, this method makes it possible to enjoy fresh harvests year-round. With the right approach, growing salad leaves in recycled bottles is easy, rewarding, and perfect for beginners.
This in-depth guide explains how to successfully grow fresh salad leaves in a bottle garden, from preparation and planting to harvesting and long-term care.
Why Choose a Bottle Garden for Salad Greens?
Bottle gardening is ideal for leafy greens because these plants have shallow roots and grow quickly. Plastic bottles are readily available, cost nothing, and can be reused instead of thrown away. They fit easily on windowsills, balconies, countertops, or hanging racks near your kitchen.
Another advantage is control. You manage soil quality, watering, and sunlight, resulting in cleaner, healthier leaves. Since salad greens grow fast, you’ll see results within weeks, making bottle gardening both motivating and practical.
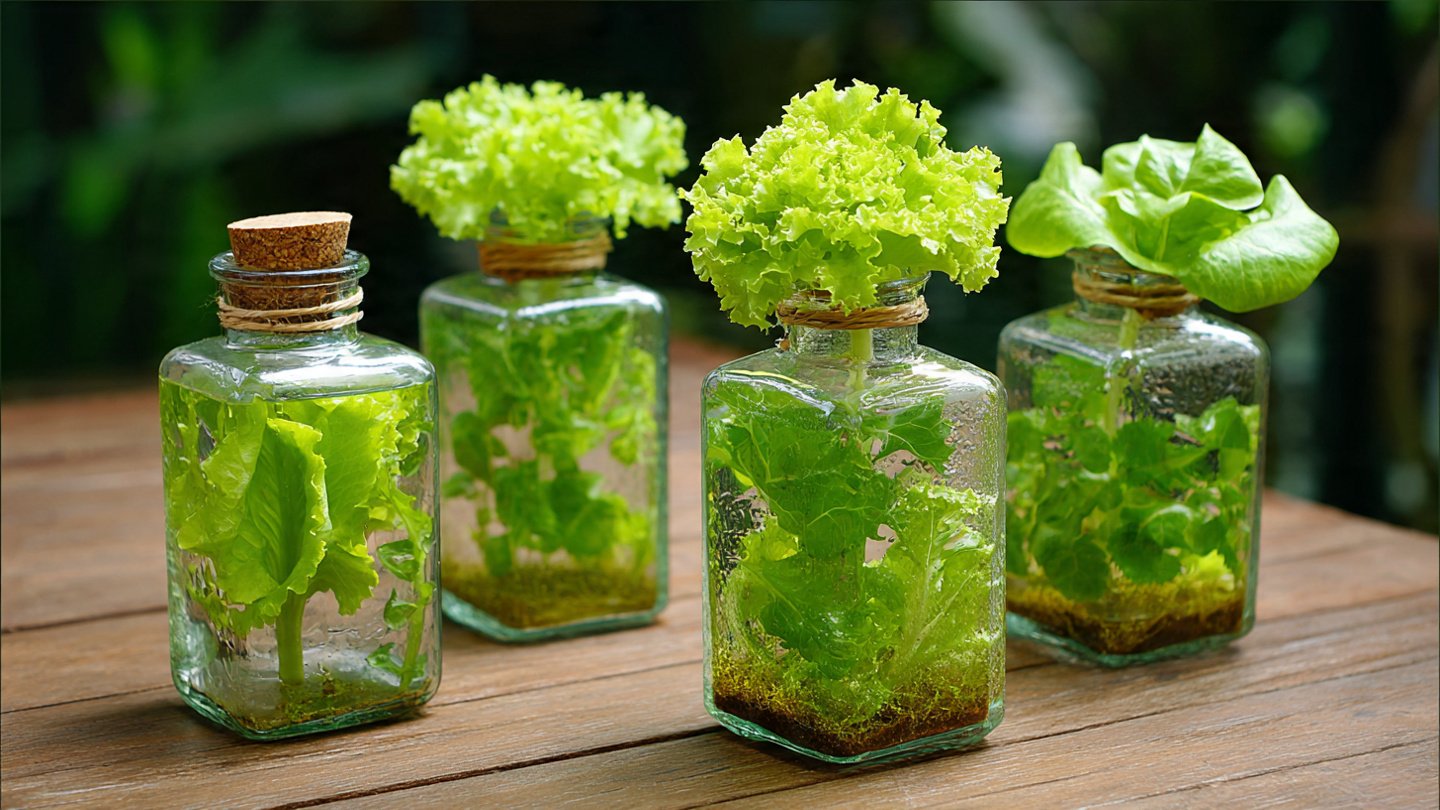
Selecting the Best Salad Leaves to Grow
Not all vegetables are suited to bottle gardens, but many salad greens thrive in small containers. Lettuce varieties, spinach, arugula, mustard greens, baby kale, and mixed salad greens are excellent choices. These plants grow well in shallow soil and tolerate partial sunlight.
Choose fast-growing, cut-and-come-again varieties if you want continuous harvests. This allows you to snip leaves regularly without removing the entire plant.
Preparing Bottles for Planting
Clean plastic bottles thoroughly to remove any residue. Bottles between 1 and 2 liters work best. Cut the bottle horizontally or vertically depending on available space. Horizontal cuts are ideal for windowsills, while vertical cuts suit hanging gardens.
Make several drainage holes at the bottom using a heated nail or sharp tool. Proper drainage is crucial to prevent waterlogging and root rot. If hanging the bottle, punch small holes on the sides and thread strong string or wire through them.
Choosing the Right Soil Mix
Salad leaves prefer loose, well-draining soil that retains moisture without becoming soggy. A good mix includes garden soil combined with compost and a small amount of sand or coco peat. This combination provides nutrients, aeration, and water retention.
Avoid heavy clay soil, as it compacts easily and restricts root growth. Before filling the bottle, lightly moisten the soil so seeds settle evenly after planting.
Planting Seeds Correctly
Sprinkle seeds evenly across the soil surface. Salad green seeds are small and should not be buried deeply. Cover them with a thin layer of soil or compost and gently press down.
Water carefully using a spray bottle or gentle stream to avoid washing seeds away. Label bottles if you’re growing multiple varieties to track growth and harvest timing.
Providing the Right Light Conditions
Light is essential for healthy leaf development. Place bottle gardens near a bright window that receives at least 4–6 hours of sunlight daily. Morning sunlight is ideal, as it is gentler than afternoon sun.
If natural light is limited, rotating bottles regularly ensures even exposure. Pale or elongated leaves indicate insufficient light, while scorched edges suggest too much direct sun.
Watering for Consistent Growth
Salad greens require consistent moisture to remain tender and flavorful. Check soil daily and water when the top layer feels dry. Avoid letting the soil dry out completely, as this can cause bitter leaves.
At the same time, overwatering leads to root problems. Drainage holes help excess water escape, but always empty trays beneath bottles to prevent standing water.
Feeding for Lush, Green Leaves
Because salad greens grow quickly, they benefit from light feeding. After seedlings develop a few true leaves, apply a diluted liquid organic fertilizer every two weeks. Compost tea or vermicompost extract works especially well for leafy growth.
Avoid excessive fertilization, which can result in overly soft leaves or nutrient imbalance. Balanced, gentle feeding produces crisp, healthy greens.
Managing Temperature and Airflow
Salad greens grow best in moderate temperatures. Extremely high heat can cause bolting, where plants produce flowers instead of leaves. Keep bottles in a well-ventilated area and avoid placing them near heat sources like stoves or ovens.
Good airflow reduces disease risk and strengthens stems. If growing indoors, opening windows occasionally or using a small fan can help maintain fresh air circulation.
Harvesting the Right Way
One of the biggest advantages of bottle gardening is continuous harvesting. Begin harvesting when leaves are 3–4 inches tall. Use clean scissors to cut outer leaves first, allowing inner leaves to continue growing.
This cut-and-come-again method extends harvests for weeks. Never remove more than one-third of the plant at a time, as this slows regrowth.
Preventing Common Problems
Most issues arise from watering mistakes or lack of light. Yellow leaves often indicate overwatering or poor drainage. Slow growth usually means insufficient light or nutrients.
Pests are rare indoors but can occasionally appear. Inspect leaves regularly and remove affected parts immediately. Gentle washing or natural sprays help manage minor infestations.
Making Bottle Gardening a Daily Habit
Successful bottle gardening depends on consistency. A quick daily check for moisture, light, and leaf health keeps plants thriving. Because bottles are small, problems develop quickly—but they are also easy to fix.
Over time, you’ll develop a routine that fits seamlessly into your kitchen life, making fresh salads a natural part of your meals.
Final Thoughts on Growing Salad Greens in Bottle Gardens
Growing fresh salad leaves in a bottle garden is a smart, sustainable way to enjoy healthy food at home. With minimal space, low cost, and simple care, this method delivers fresh harvests straight from your kitchen.
By choosing the right greens, preparing bottles properly, maintaining light and moisture, and harvesting correctly, you can enjoy continuous, flavorful salads year-round. Bottle gardening not only saves money and reduces waste—it brings the joy of growing food into your everyday life.