Growing your own food doesn’t have to be complicated, expensive, or time-consuming. If you’re new to gardening and want fast, healthy results, microgreens are one of the easiest and most rewarding crops you can grow. Even better, you don’t need pots, soil beds, or fancy equipment. With just a simple plate and a few basic supplies, you can enjoy fresh, nutrient-dense greens in as little as 7–10 days.
This beginner-friendly guide will walk you through everything you need to know about growing microgreens in plates—from choosing seeds to harvesting lush greens—using an easy, no-stress method anyone can follow.
What Are Microgreens?
Microgreens are young vegetable greens harvested shortly after germination, typically when the first set of true leaves appears. They are more mature than sprouts but younger than baby greens. Despite their small size, microgreens are packed with flavor and nutrients, often containing higher vitamin and mineral levels than fully grown plants.
Popular microgreens include:
- Mustard
- Radish
- Fenugreek (methi)
- Coriander
- Broccoli
- Kale
- Peas
They are widely used in salads, sandwiches, smoothies, and garnishes, adding both nutrition and visual appeal.
Why Grow Microgreens in Plates?
Using plates instead of pots or trays offers several advantages, especially for beginners:
- Low Cost – Plates are easily available at home, so there’s no need to buy containers.
- Space-Saving – Perfect for small kitchens, balconies, or windowsills.
- Beginner-Friendly – Simple setup with minimal steps.
- Quick Results – Harvest within days, keeping motivation high.
- Clean and Manageable – Less soil, less mess.
This method is ideal if you want fresh greens without committing to traditional gardening.
What You’ll Need
To get started, gather the following items:
- Flat plate or shallow dish (ceramic, plastic, or steel)
- Absorbent base (thin layer of cocopeat, tissue paper, or cotton cloth)
- Microgreen seeds (untreated and preferably organic)
- Clean water
- Spray bottle or small cup
- A sunny windowsill or bright indoor space
That’s it—no fertilizers, no tools, and no prior experience required.
Step-by-Step Guide to Growing Microgreens in Plates
Step 1: Prepare the Plate
Choose a flat plate with slightly raised edges to hold moisture. Line the base with a thin layer of cocopeat or place folded tissue paper or cotton cloth evenly across the plate. The goal is to retain moisture while allowing roots to anchor.
Lightly moisten the base so it’s damp but not soggy.
Step 2: Soak the Seeds (Optional but Helpful)
Some seeds, such as fenugreek or peas, benefit from soaking for 6–8 hours to speed up germination. Smaller seeds like mustard or broccoli don’t require soaking and can be used directly.
Drain soaked seeds well before spreading.
Step 3: Spread Seeds Evenly
Sprinkle the seeds evenly across the surface. Avoid overcrowding, as tightly packed seeds can lead to poor air circulation and mold. A single, even layer works best.
Gently press the seeds down with your fingers so they make good contact with the moist base.
Step 4: Cover and Germinate
Cover the plate with another plate or a lid to create darkness, which encourages sprouting. Place it in a warm area away from direct sunlight for 2–3 days.
Check daily and mist lightly if the base begins to dry.
Step 5: Expose to Light
Once you see small shoots emerging, remove the cover and place the plate in indirect sunlight or near a bright window. This helps the microgreens turn green and grow upright.
Water gently once or twice a day, preferably by misting, to avoid disturbing the roots.
Step 6: Maintain Moisture
Keep the growing medium consistently moist but never waterlogged. Excess water can cause fungal growth or rot. Good airflow and moderate watering are key to healthy microgreens.
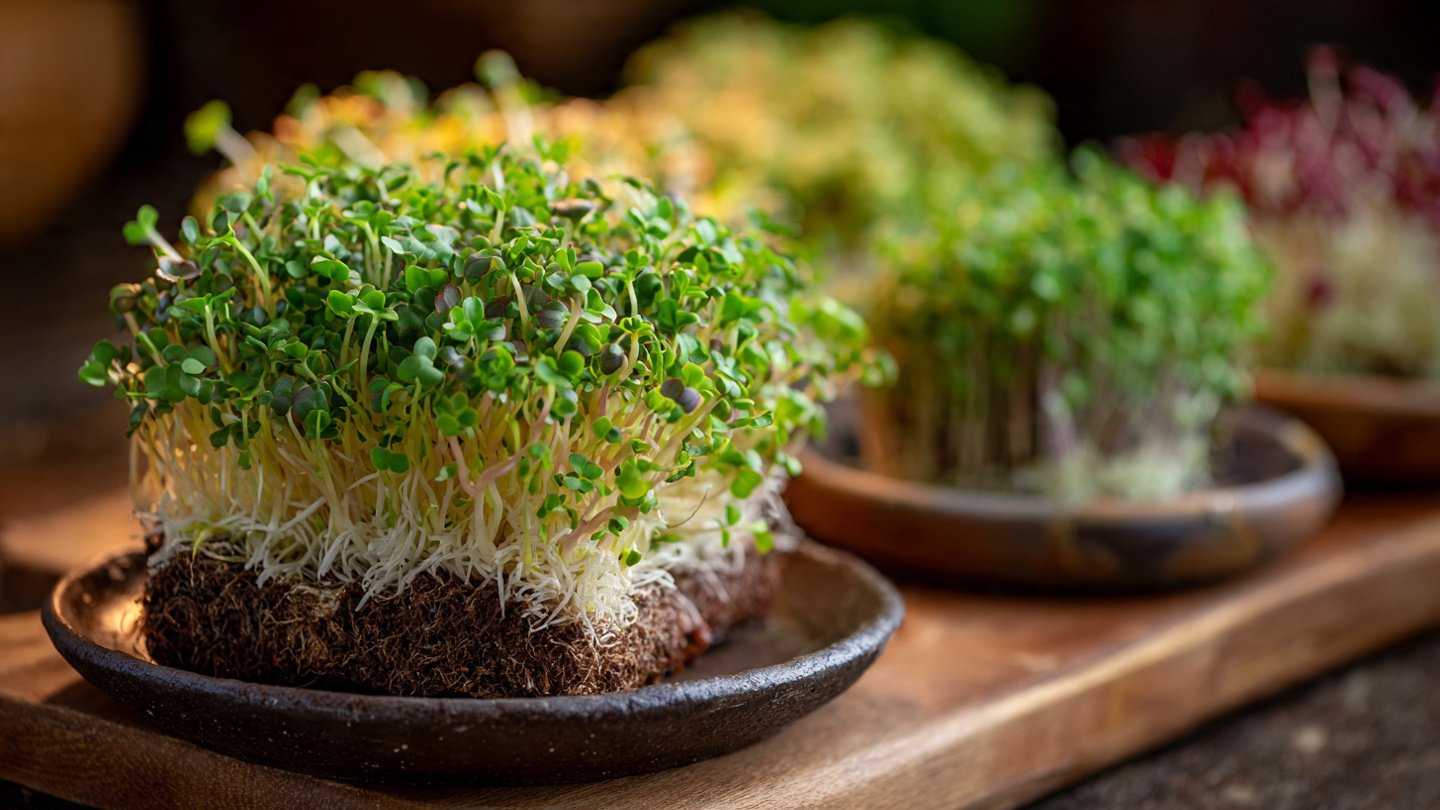
Harvesting Your Microgreens
Microgreens are usually ready to harvest between 7 and 10 days, depending on the variety. They should be about 2–4 inches tall and have fully opened leaves.
Use clean scissors to cut the greens just above the base. Harvest only what you need, as microgreens are best enjoyed fresh.
How to Use Microgreens in Daily Meals
Fresh microgreens can instantly elevate everyday dishes. Try adding them to:
- Salads for extra crunch and nutrition
- Sandwiches and wraps
- Smoothies and juices
- Omelets and scrambled eggs
- Soups as a fresh topping
Their mild to spicy flavors make them versatile and enjoyable for all age groups.
Common Mistakes to Avoid
- Overwatering – Leads to mold and weak roots.
- Overcrowding seeds – Reduces airflow and growth quality.
- Lack of light after sprouting – Causes pale, leggy greens.
- Using treated seeds – Always choose edible, untreated seeds.
Being mindful of these simple points ensures consistent success.
Benefits of Growing Microgreens at Home
- Fresh and chemical-free food
- Saves money over store-bought greens
- Year-round growing, even indoors
- Encourages healthy eating habits
- Perfect introduction to gardening
For beginners, this method builds confidence while delivering fast, visible results.
Final Thoughts
Growing microgreens in plates is one of the easiest ways to start your home gardening journey. With minimal effort, low cost, and quick rewards, it’s perfect for busy individuals, apartment dwellers, and anyone curious about growing their own food.
Once you experience how simple and satisfying it is, you can experiment with different seed varieties, plate sizes, and growing locations. In just a few days, you’ll have fresh, vibrant greens ready to harvest—right from your kitchen.