Gardening at home doesn’t have to mean a large backyard or expensive equipment. Even if you have just a balcony, terrace, or a small windowsill, you can grow fresh vegetables and enjoy the satisfaction of a thriving garden. The secret? Plastic bottles. With a little creativity, these everyday items can become effective, eco-friendly planters for a beautiful vegetable garden right at home.
Not only does this approach reduce waste, but it also makes gardening affordable, fun, and suitable for anyone—even beginners. Here’s a complete guide to transforming plastic bottles into a productive vegetable garden.
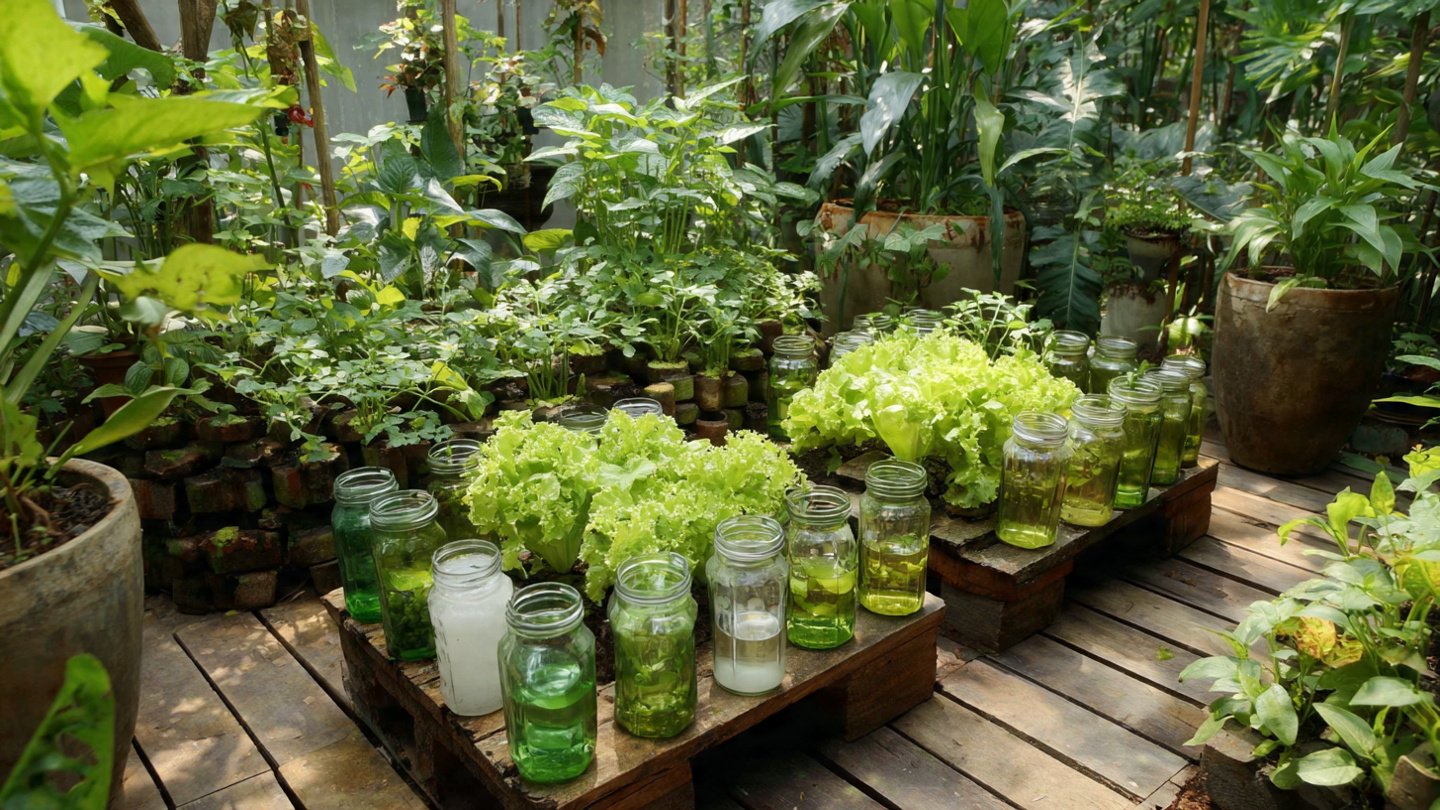
Why Plastic Bottles Work for Gardening
Plastic bottles are more than just trash—they’re versatile, lightweight, and portable containers that can grow a surprising variety of vegetables. Here’s why they work:
- Affordable and accessible: Most households have leftover bottles.
- Portable: Move them easily to catch sunlight or protect plants from harsh weather.
- Space-efficient: Great for balconies, small patios, or windowsills.
- Customizable: Cut, stack, or hang bottles in vertical or horizontal layouts.
- Eco-friendly: Reduce plastic waste while producing healthy food.
Crops like tomatoes, lettuce, spinach, herbs, green onions, and even small cabbages grow well in bottles.
Step 1: Collect and Prepare Plastic Bottles
Before planting, you’ll need a few supplies:
- Large plastic bottles (1–3 liters work best)
- Sharp scissors or a craft knife
- Potting soil or a compost mix
- Vegetable seeds or seedlings
- Watering can or spray bottle
How to prepare bottles:
- Wash bottles thoroughly to remove any residue.
- Cut the bottles to create openings for soil and plants. Horizontal cuts or removing the top works well.
- Make drainage holes at the bottom. This prevents waterlogging, which can harm roots.
- Optional: Wrap transparent bottles in paper or paint to prevent algae growth.
Step 2: Fill Bottles With Soil
Crops grow best in nutrient-rich, well-draining soil. You can use:
- Commercial potting mix
- Homemade compost mixed with garden soil
- A combination of compost + sand for improved drainage
Fill bottles about three-quarters full, leaving space for planting seeds or seedlings.
Step 3: Plant Your Vegetables
For seeds:
- Plant 2–3 seeds per bottle.
- Once seedlings sprout, thin to the strongest plant.
For seedlings:
- Gently transplant so roots are covered but the crown remains above soil.
- Ensure enough spacing to avoid overcrowding (10–12 inches for larger plants).
Tip: Vertical arrangements are possible by stacking bottles or hanging them, which saves space and creates an eye-catching display.
Step 4: Watering and Care
Plastic bottles dry out quickly because they’re shallow. Consistent watering is key:
- Keep soil evenly moist but not waterlogged.
- Use a watering can or spray bottle to avoid disturbing seedlings.
- Mulch the soil with straw or small leaves to retain moisture.
Check drainage regularly; waterlogged roots can rot quickly.
Step 5: Sunlight and Support
Most vegetables need at least 5–6 hours of sunlight daily. Place bottles where plants receive bright, indirect sunlight.
- If plants grow tall (like tomatoes or beans), add small stakes or sticks for support.
- Rotate bottles occasionally to ensure even sunlight for all plants.
Step 6: Fertilizing
Even nutrient-rich soil can benefit from light feeding:
- Use organic compost every 3–4 weeks.
- Optional: dilute liquid fertilizer every 2 weeks for faster growth.
- Avoid over-fertilizing; too much nitrogen leads to leafy plants with fewer vegetables.
Step 7: Protect Your Plants From Pests
Small container gardens are less prone to pests, but they’re not immune. Common pests include aphids, caterpillars, and snails.
- Inspect plants weekly.
- Remove pests by hand or use neem oil or organic insecticidal soap.
- Companion plants like mint or basil can naturally deter pests.
Healthy plants with proper care are more resistant to insects.
Step 8: Harvesting
Knowing when to harvest is crucial for a productive garden:
- Leafy greens: Pick leaves regularly to encourage new growth.
- Tomatoes, peppers, cucumbers: Harvest when fully colored and firm.
- Herbs: Snip leaves as needed; regular trimming promotes bushy growth.
Plastic bottle gardens make harvesting easy, even in tight spaces.
Creative Plastic Bottle Garden Ideas
- Hanging Bottle Garden: Cut a hole in the side of the bottle and hang using rope or wire. Perfect for herbs or small vegetables.
- Stacked Vertical Garden: Cut bottles horizontally and stack them with holes to let water flow to lower levels. Great for limited space.
- Window Sill Herb Garden: Line bottles along a window for fresh herbs all year.
- Colorful Planters: Paint or decorate bottles for an attractive display.
- Community Bottle Garden: Encourage kids or neighbors to plant in bottles and create a shared urban garden.
Benefits of a Plastic Bottle Vegetable Garden
- Cost-effective: No need for expensive pots or garden beds.
- Eco-friendly: Reuse plastic bottles instead of discarding them.
- Space-saving: Works in apartments, balconies, or small yards.
- Beginner-friendly: Perfect for those new to gardening.
- Educational: Teaches kids about plants, recycling, and sustainability.
Final Thoughts
A beautiful vegetable garden doesn’t require a lot of space or money. With just a few plastic bottles, soil, and seeds, you can create a productive, sustainable, and visually appealing garden at home. From leafy greens to small cabbages, tomatoes, and herbs, there’s no limit to what you can grow.
Plastic bottle gardening is not only practical but also a fun DIY project for families, beginners, and anyone looking to eat fresh, homegrown vegetables. Start small, follow these steps, and watch your dream garden flourish in even the tiniest space.