If you’re a gardener looking to boost plant health and improve soil structure, you’ve probably heard about coco coir bricks—also called coir bricks. These compressed blocks of coconut fiber are fast becoming a favorite alternative to peat moss and traditional soil conditioners. They are sustainable, lightweight, and incredibly versatile, making them a must-have for both indoor and outdoor gardening. This guide explains what coir bricks are, why they’re beneficial, and exactly how to use them to create healthier plants and better soil.
What Are Coco Coir Bricks?
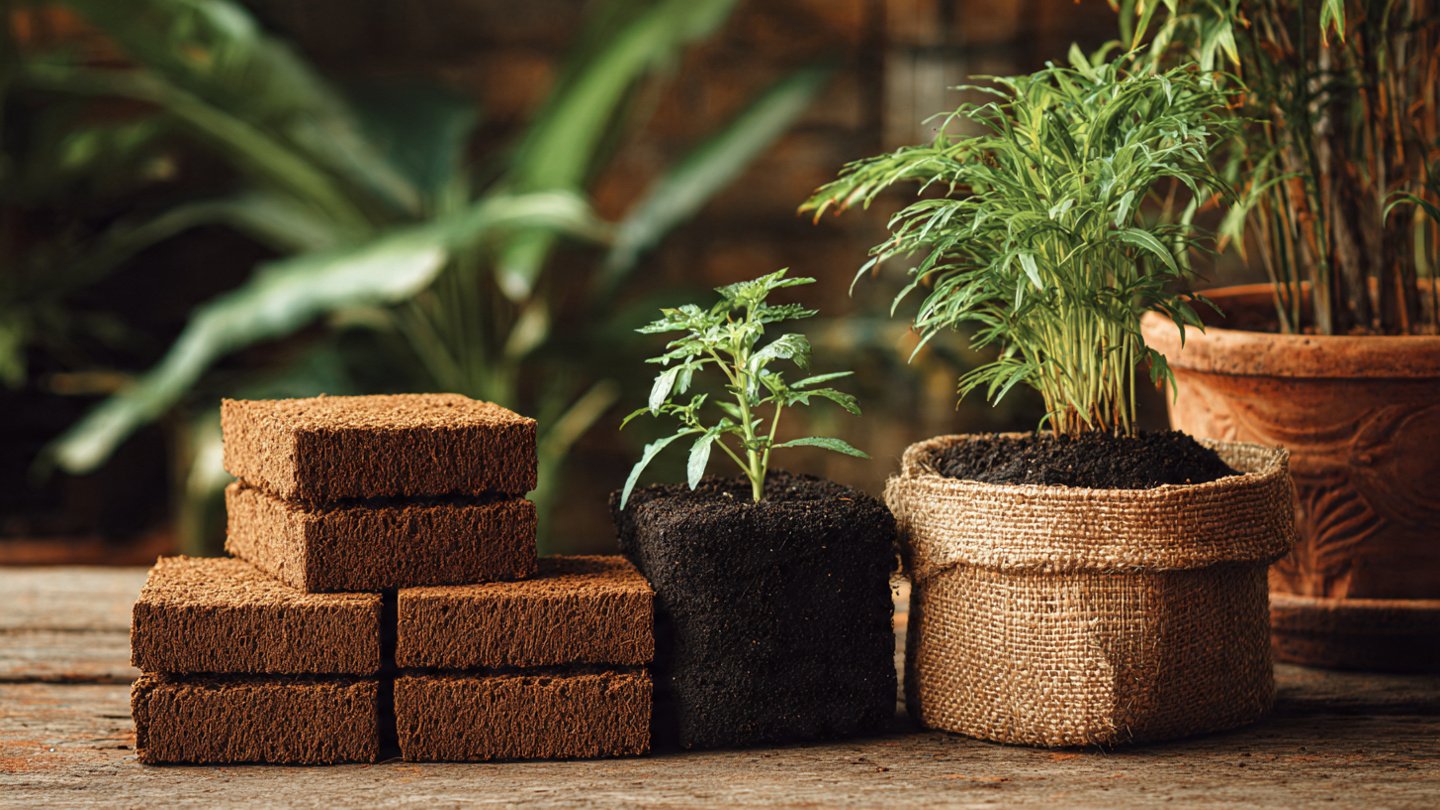
Coco coir bricks are made from the fibrous husk of coconuts. After harvesting coconuts, the fibrous material is collected, cleaned, and compressed into small, dense bricks. These bricks are dehydrated, making them compact for easy storage and transport. When hydrated, they expand into a fluffy, soil-like medium perfect for planting, potting, or soil amendment.
Coir bricks come in various sizes, usually ranging from 650 grams to 5 kilograms, depending on how much expanded material you want per brick. A single 650-gram brick can yield roughly 8–9 liters of usable coir.
Why Coco Coir Bricks Are Beneficial for Plants
Coco coir has unique properties that make it excellent for plant growth:
- Excellent Water Retention – Coir holds up to 10 times its weight in water, keeping your plants hydrated without waterlogging.
- Improved Aeration – Unlike compacted soil, coir is light and fluffy, allowing roots to breathe and preventing root rot.
- Neutral pH – Most coir bricks have a pH between 5.5 and 6.8, which is ideal for most plants.
- Sustainable and Renewable – Unlike peat moss, which takes centuries to form, coconut coir is a renewable by-product of coconuts.
- Reduced Soil Compaction – Coir mixes with soil to prevent it from hardening over time, promoting better root growth.
- Good for Nutrient Retention – Coir holds onto nutrients and releases them gradually, enhancing soil fertility.
How to Hydrate Coco Coir Bricks
Coir bricks must be expanded before use. Here’s a step-by-step guide:
- Prepare a Container – Use a large bucket, basin, or wheelbarrow depending on the brick size.
- Add Water – Use warm or room-temperature water. Typically, 1 brick requires 4–5 liters of water.
- Break and Mix – Place the brick in water and let it absorb. Break it apart and mix occasionally.
- Wait for Expansion – Within 15–30 minutes, the brick will expand into a fluffy, spongy medium ready for use.
- Drain Excess Water – If too wet, let it drain for a few minutes to reach a loose, damp consistency.
Tip: Coir bricks can also be soaked overnight for maximum fluffiness and uniform hydration.
Using Coco Coir Bricks for Potting Mixes
One of the most common uses for coir bricks is creating a potting mix for indoor and outdoor plants. Here’s how:
Basic Coir Potting Mix Recipe:
- 2 parts hydrated coco coir
- 1 part compost or well-rotted organic matter
- 1 part perlite or vermiculite for drainage
Instructions: Mix thoroughly and use immediately to pot your plants. This combination provides excellent water retention, aeration, and nutrients.
Optional Additions:
- Worm castings – Boost nutrients for fruiting or flowering plants
- Slow-release fertilizer – Supports steady growth over time
- Charcoal bits – Helps prevent odors in indoor pots
Using Coco Coir Bricks to Improve Garden Soil
Coco coir isn’t just for pots—it’s excellent for garden beds as well.
Steps:
- Hydrate the Brick – As explained above.
- Spread Over Soil – Mix coir into the top 15–20 cm of garden soil.
- Combine With Compost – Add organic compost to enhance fertility.
- Mix Thoroughly – Ensure coir is evenly distributed to avoid dry spots.
Benefits for garden soil:
- Increases moisture retention during dry periods
- Improves drainage in clay-heavy soils
- Enhances root penetration and structure
- Reduces soil compaction over time
Using Coco Coir Bricks for Seed Starting
Coir is a fantastic medium for germinating seeds because it’s sterile and lightweight. Here’s a simple guide:
- Hydrate coir as usual
- Fill seed trays or small pots
- Plant seeds according to instructions
- Keep the medium moist but not waterlogged
- Watch seeds sprout in a few days to weeks
Coir’s texture supports delicate roots, reduces disease risk, and can be reused for multiple planting cycles after composting.
Using Coco Coir Bricks for Hydroponics
Coco coir is also popular in hydroponic systems. Its water retention and aeration properties make it ideal for soilless cultivation. Simply hydrate the brick, rinse lightly to remove excess salts, and use it as the growing medium in your hydroponic setup. Plants like lettuce, tomatoes, strawberries, and herbs thrive in coir-based hydroponics.
Caring for Plants in Coir
While coir is excellent, it has some considerations:
- Nutrient Supplementation: Coir itself has minimal nutrients, so adding compost, liquid fertilizer, or slow-release fertilizer is necessary.
- pH Monitoring: Although naturally near-neutral, some coir may need occasional pH adjustment for sensitive plants.
- Avoid Overwatering: Coir retains water well, so reduce watering frequency compared to soil.
With proper care, plants in coir will grow stronger, healthier, and more productive.
Storage and Shelf Life of Coco Coir Bricks
Unopened coir bricks can last for years if kept dry. Once hydrated, store any extra in a sealed container to prevent drying out or contamination. Coir is resistant to mold and pests, making it a convenient long-term gardening resource.
Final Thoughts
Coco coir bricks are a game-changer for gardeners seeking healthier plants and better soil. They offer excellent water retention, aeration, and sustainability, making them ideal for potted plants, garden beds, seed starting, and hydroponics. By hydrating and using coir bricks properly, you can create the perfect growing environment for virtually any plant.
Whether you’re a beginner looking for an easy soil amendment or an experienced gardener wanting to boost your plants’ performance, coir bricks are versatile, effective, and environmentally friendly. With this simple, step-by-step approach, you’ll see healthier roots, stronger growth, and happier, more productive plants—season after season.