Wheatgrass is a powerhouse of nutrients, packed with vitamins, minerals, and antioxidants that support overall health. Known for boosting immunity, aiding digestion, and detoxifying the body, wheatgrass has become a favorite among health enthusiasts worldwide. But what if you could grow fresh wheatgrass without soil—right in your kitchen—without the mess, fuss, or complicated setup? This guide reveals an easy, soil-free method to grow vibrant, healthy wheatgrass, step by step, so you can enjoy fresh greens anytime.
Why Grow Wheatgrass Without Soil?
Traditional soil-based wheatgrass cultivation can be messy, space-consuming, and time-intensive. Growing wheatgrass hydroponically or using soil-free methods offers several advantages:
- Clean and convenient: No dirt, minimal mess, perfect for indoor spaces.
- Faster growth: Hydroponic setups allow roots to access nutrients directly, speeding up germination and growth.
- Space-efficient: Grow trays or jars can fit on countertops, windowsills, or small kitchens.
- Continuous supply: Easy to maintain a cycle for fresh wheatgrass year-round.
- Healthier sprouts: Clean water-based growth reduces exposure to soil-borne pests or fungi.
This method makes wheatgrass cultivation practical for beginners and seasoned growers alike.
Materials Needed for Soil-Free Wheatgrass
To get started, gather the following materials:
- Wheatgrass seeds: Look for organic, untreated seeds for safe consumption.
- Water: Clean, filtered water is essential.
- Growing trays or shallow containers: Plastic or glass trays with drainage holes or simple shallow dishes work well.
- Spray bottle or watering jug: For regular misting or gentle watering.
- Paper towels, cotton, or coconut fiber (optional): For germination support.
With these simple materials, you can grow wheatgrass indoors without the need for soil.
Step 1: Soaking the Seeds
Soaking is a crucial first step to kickstart germination:
- Rinse seeds thoroughly to remove dust or debris.
- Place seeds in a bowl and cover with clean water.
- Let them soak for 8–12 hours or overnight.
- Drain and rinse seeds thoroughly after soaking.
Soaking softens the seed coat, activating enzymes that promote fast, healthy sprout growth.
Step 2: Germination
Once seeds are soaked, germination begins:
- Spread the seeds evenly on a damp paper towel, cotton sheet, or shallow tray lined with coconut fiber.
- Cover lightly with another damp layer or keep in a dark, warm spot (20–25°C) for 1–2 days.
- Rinse and drain seeds twice daily to prevent mold or stagnation.
Within 24–48 hours, tiny roots will emerge, signaling the beginning of germination.
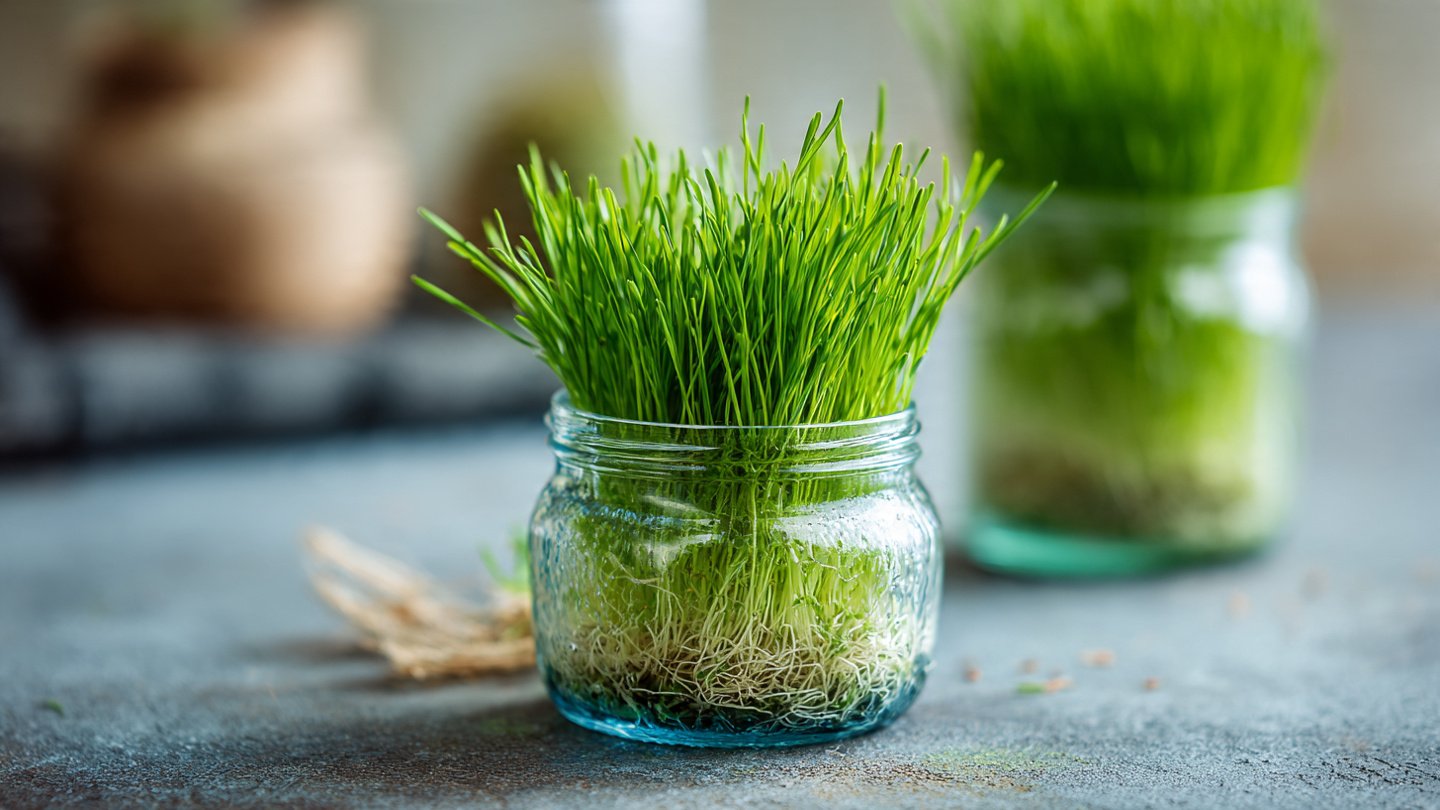
Step 3: Transferring to a Soil-Free Setup
After seeds have sprouted, move them to the growing tray or container:
- Tray method: Lay the germinated seeds evenly on a tray lined with a damp paper towel or cotton sheet.
- Water-based method: Place sprouts in a shallow tray with a thin layer of water at the bottom, ensuring roots touch water but not the entire sprout.
- Position: Place the tray in indirect sunlight or under a grow light for 8–10 hours per day.
The sprouts will continue to grow rapidly in this soil-free environment, producing lush, green wheatgrass within days.
Step 4: Watering and Maintenance
Even without soil, wheatgrass needs consistent moisture:
- Spray water lightly on the sprouts 2–3 times daily to keep them hydrated.
- If using a shallow water tray, ensure the water level is shallow enough to prevent submerging the leaves.
- Avoid stagnant water, which can lead to mold or root rot.
- Maintain temperature between 18–25°C for optimal growth.
Regular attention ensures healthy, vibrant wheatgrass that is ready to harvest quickly.
Step 5: Providing Light
Wheatgrass needs light for chlorophyll production, which gives it its bright green color and nutritional value:
- Indirect sunlight works best; direct sunlight may dry out the sprouts.
- If indoors, place near a bright window or use an LED grow light for 8–10 hours daily.
- Rotate trays if necessary to ensure even growth.
Light encourages strong, nutrient-rich shoots that are ideal for juicing or garnishing dishes.
Step 6: Harvesting Your Wheatgrass
Wheatgrass grows incredibly fast, and the best time to harvest is typically 7–10 days after sprouting:
- Cut the grass just above the base with scissors.
- Avoid pulling roots, as you can reuse them for a second crop in some setups.
- Use immediately for juice, smoothies, or salads for maximum freshness and nutritional value.
Harvesting regularly encourages new growth if roots are healthy, allowing continuous production.
Reusing and Continuous Growing
One of the advantages of soil-free wheatgrass is the potential for a continuous cycle:
- After harvesting, rinse the roots and re-establish them in fresh water or damp paper towel.
- Start a new batch of seeds every 3–5 days for a steady supply.
- Monitor for mold or stagnation; replace growing medium as needed.
This rotation ensures that fresh, nutrient-rich wheatgrass is always available in your kitchen.
Health Benefits of Homegrown Wheatgrass
Growing your own wheatgrass allows you to enjoy its numerous health benefits:
- Detoxification: Wheatgrass supports liver function and helps eliminate toxins.
- Immune support: Rich in vitamins A, C, and E, boosting overall immunity.
- Digestive health: Contains enzymes that aid digestion and nutrient absorption.
- Energy and vitality: Packed with chlorophyll, minerals, and antioxidants for natural energy.
- Alkalizing effect: Helps balance body pH and reduce acidity from processed foods.
Freshly harvested wheatgrass provides far superior nutrition compared to store-bought juice or powders.
Tips for Effortless Success
- Use organic seeds to avoid chemicals or growth inhibitors.
- Keep your trays clean to prevent mold and pests.
- Maintain consistent moisture but avoid overwatering.
- Harvest at the right stage—when shoots are 7–10 cm tall—for optimal flavor and nutrients.
- Rotate crops to ensure you always have fresh wheatgrass ready.
By following these tips, growing wheatgrass without soil becomes a simple, clean, and highly productive routine.
Final Thoughts
Growing wheatgrass without soil is one of the easiest and most rewarding ways to have fresh, nutrient-packed greens at your fingertips. With minimal setup, simple materials, and a little daily care, you can enjoy vibrant wheatgrass year-round without the mess of soil or complicated gardening techniques.
Whether you want wheatgrass for juicing, smoothies, salads, or even decorative purposes, this soil-free method ensures healthy, fast-growing shoots with maximum nutrition. By following this easy hack, you’ll have a convenient, sustainable source of superfood greens right in your home, supporting your health effortlessly.