Roses are among the most loved flowering plants in home gardens, admired for their beauty, fragrance, and variety. While many gardeners buy rose plants from nurseries, propagating roses from cuttings is an economical, satisfying, and surprisingly simple way to grow new plants. With the right technique and a little patience, you can multiply your favorite rose varieties and enjoy healthy, blooming plants year after year. This complete guide explains everything you need to know to successfully propagate roses from cuttings at home.
Why Grow Roses from Cuttings?
Propagating roses from cuttings allows you to create exact copies of a parent plant you already love. Unlike growing roses from seeds, which may produce unpredictable results, cuttings ensure the same color, fragrance, and growth habit. It is also cost-effective, making it ideal for gardeners who want many plants without spending much money.
Another advantage is control. When you propagate at home, you know exactly how the plant has been grown, avoiding chemicals and ensuring healthier growth from the start.
Understanding Rose Cuttings
A rose cutting is a healthy stem section taken from a mature plant and encouraged to grow roots. Once roots form, the cutting becomes an independent plant. The success of this process depends on the timing, stem selection, and aftercare.
Roses can be propagated using softwood, semi-hardwood, or hardwood cuttings. For beginners, semi-hardwood cuttings taken from healthy, recently bloomed stems give the best success rate.
Best Time to Propagate Roses
The ideal time to take rose cuttings is during mild weather when the plant is actively growing but not stressed by extreme heat or cold. Late spring, early summer, and early autumn are excellent periods.
Avoid taking cuttings during peak flowering or extreme winter, as the plant’s energy is either focused on blooms or survival rather than root development.
Selecting the Right Rose Stem
Choosing the correct stem is one of the most important steps.
- Select a healthy, disease-free stem.
- The stem should be about pencil-thick.
- Choose a stem that has recently finished flowering.
- Avoid very young, soft stems or very old, woody ones.
A cutting length of 6–8 inches works best, with at least two to three leaf nodes.
How to Prepare Rose Cuttings
- Use sharp, clean pruning shears to prevent disease.
- Cut the stem just below a leaf node at a slight angle.
- Remove the flower bud and any leaves from the lower half of the cutting.
- Keep only one or two leaves at the top to reduce moisture loss.
- If available, dip the cut end in rooting hormone to encourage faster root growth.
Although rooting hormone improves success, roses can still root without it if conditions are right.
Choosing the Right Growing Medium
A well-draining medium is essential for rose cuttings. Heavy soil can cause rot before roots develop.
Good options include:
- Garden soil mixed with sand and compost
- Coco peat mixed with perlite
- River sand with a small amount of organic matter
The medium should stay slightly moist but never soggy.
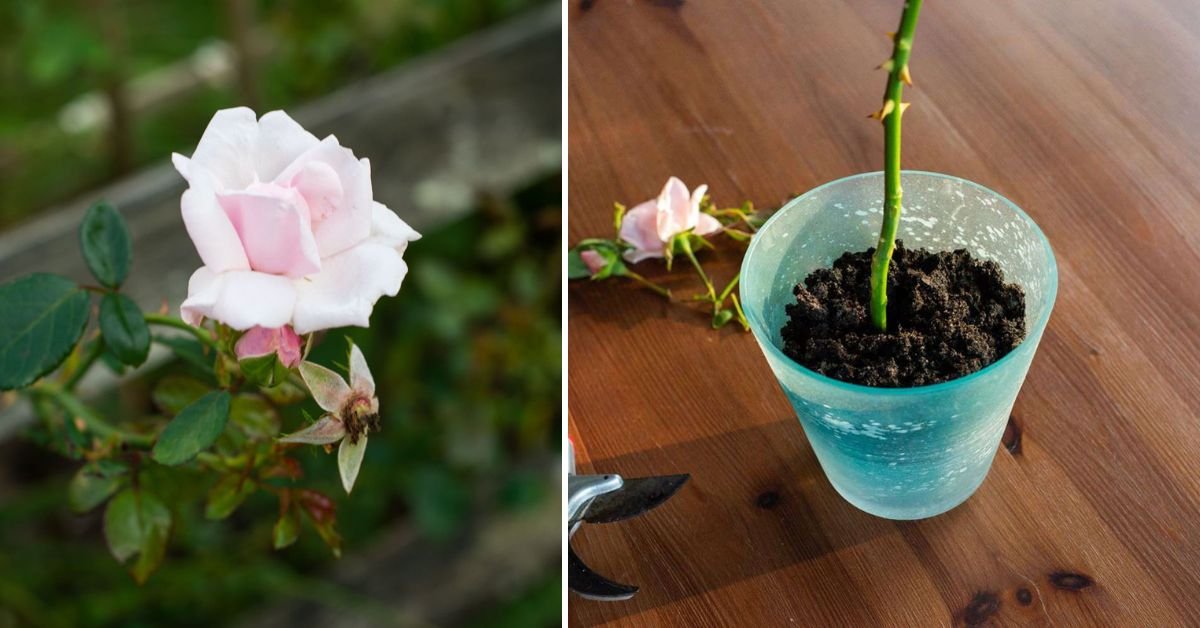
Planting the Cuttings
Make a small hole in the growing medium using a stick or finger. Insert the cutting so that at least one or two nodes are below the soil surface. Gently press the soil around the cutting to keep it upright.
Water lightly after planting to settle the soil.
If planting multiple cuttings, space them a few inches apart to ensure good airflow.
Creating the Right Environment
Rose cuttings need warmth and humidity to root successfully.
- Place the pot in a bright location with indirect sunlight.
- Avoid direct sun, which can dry out the cutting.
- Cover the pot with a transparent plastic bag or bottle to create a mini greenhouse.
- Ensure some airflow by making small holes in the cover.
Humidity helps prevent moisture loss while roots are forming.
Watering and Care During Rooting
Check the soil regularly to ensure it remains moist but not wet. Overwatering is one of the most common causes of failure.
Mist the leaves occasionally if the air is dry. Avoid fertilizing during this stage, as nutrients are unnecessary before roots develop.
Rooting usually takes 3–6 weeks, depending on temperature and rose variety.
Signs of Successful Rooting
You’ll know your rose cutting has rooted when:
- New leaves start to grow
- The cutting resists gentle pulling
- The stem remains green and firm
Once new growth appears, gradually remove the humidity cover to help the plant adjust to normal conditions.
Transplanting the Rooted Cuttings
After 6–8 weeks, when the roots are well developed, the new rose plant can be transplanted.
- Choose a sunny location with well-draining soil.
- Dig a hole large enough to accommodate the roots.
- Plant carefully without disturbing the root system.
- Water thoroughly after transplanting.
For potted roses, select a container with good drainage and rich soil.
Feeding and Ongoing Care
Once established, roses benefit from regular feeding.
- Use compost or well-rotted manure every 4–6 weeks.
- Apply balanced fertilizer during the growing season.
- Mulch around the base to retain moisture and suppress weeds.
Prune lightly to shape the plant and encourage bushy growth.
Common Problems and Solutions
- Cuttings turning black: Usually caused by excess moisture or poor drainage.
- Leaves wilting: Low humidity or too much sun exposure.
- No root formation: Cutting may be too old or conditions too cold.
Adjusting care and trying again often leads to success.
Final Thoughts
Propagating roses from cuttings is a rewarding gardening skill that allows you to expand your rose collection with minimal cost and effort. With the right timing, proper preparation, and gentle care, even beginners can achieve excellent results. Watching a simple stem transform into a thriving rose bush is deeply satisfying and brings lasting beauty to your home garden. Start with one cutting today, and soon you’ll be surrounded by roses you grew yourself.