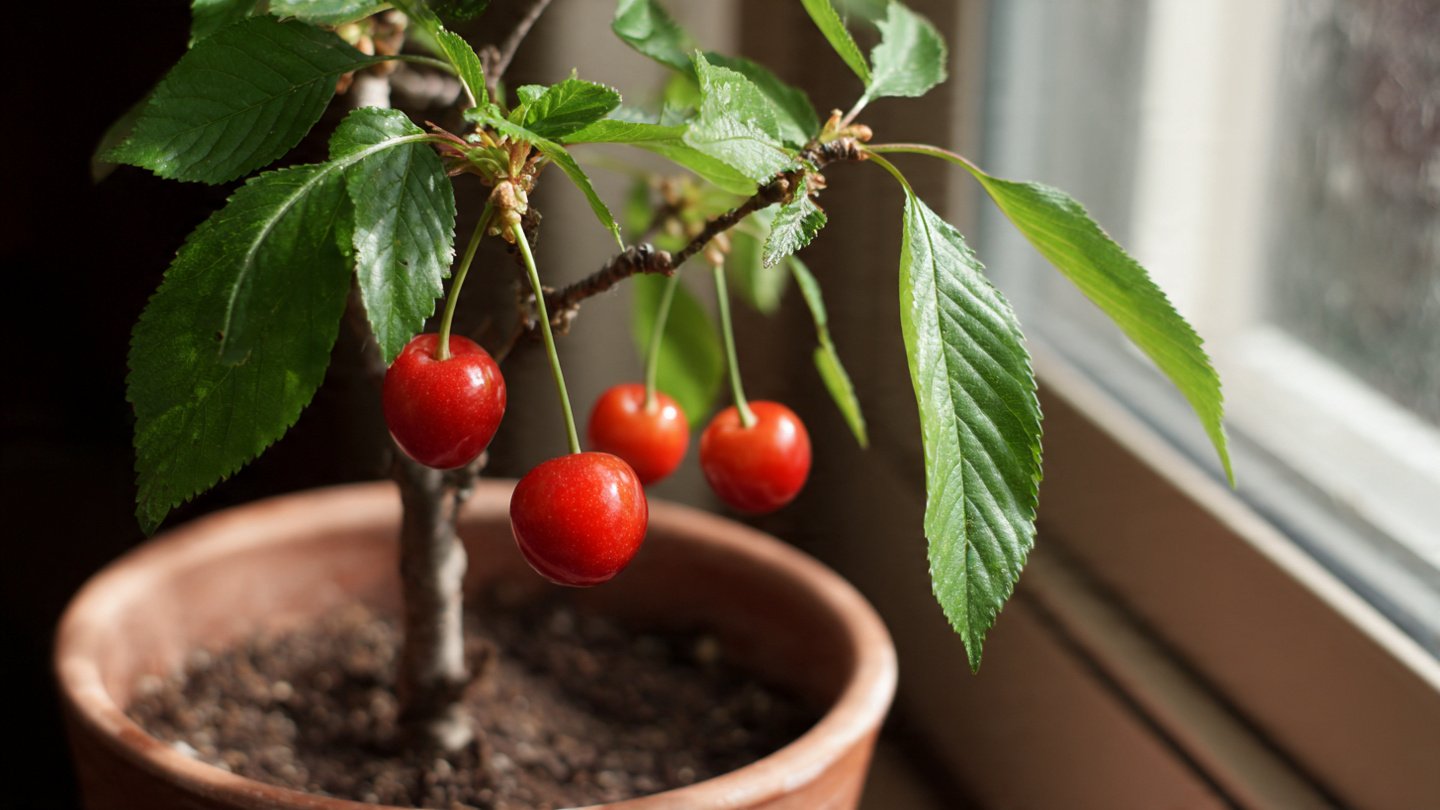
Growing cherry saplings indoors may seem like a daunting task for beginners, but with the right techniques and a little patience, it can be a highly rewarding experience. Cherry trees are known for their delicate, fragrant blossoms and their delicious fruit, but even before they mature, their saplings can add beauty to your indoor space. In this guide, we’ll walk you through a step-by-step process to successfully grow cherry saplings indoors using simple, beginner-friendly methods.
Understanding Cherry Saplings
Before diving into the techniques, it’s important to understand what a cherry sapling is. A sapling is a young tree that has developed from a seed or cutting but hasn’t yet matured into a full-sized tree. Cherry saplings, whether sweet or sour varieties, require proper care to grow strong roots and healthy foliage. Indoor growth offers a controlled environment, protecting young saplings from harsh weather, pests, and fluctuating outdoor conditions.
Selecting the Right Cherry Variety
The first step is to choose a cherry variety suitable for indoor growth. Some cherry trees are better suited for container planting because they are naturally dwarf varieties. Popular options for indoor cultivation include:
- Stella Cherry – Self-pollinating and compact, perfect for smaller indoor spaces.
- North Star Cherry – Cold-tolerant and manageable in size, ideal for container growth.
- Bing Cherry – Produces larger fruit but may require more care and sunlight.
Selecting the right variety ensures that your saplings thrive indoors without requiring excessive space or maintenance.
Gathering Supplies
For beginners, having the right supplies simplifies the process. You’ll need:
- Cherry seeds or young saplings
- Small pots (4–6 inches in diameter to start)
- Well-draining potting soil
- Spray bottle for watering
- Grow lights (optional but recommended for limited sunlight)
- Fertilizer suitable for fruiting trees
Having these items ready will make the planting and nurturing process smoother and more enjoyable.
Step 1: Preparing the Seeds
If you are starting from cherry seeds rather than saplings, you’ll need to prepare them for planting. Cherry seeds require a process called stratification, which mimics the natural winter conditions the seeds would experience outdoors.
- Clean the Seeds: Remove the seed from the cherry fruit and wash off any remaining pulp.
- Dry the Seeds: Let the seeds dry for 24 hours.
- Cold Stratification: Place the seeds in a damp paper towel inside a plastic bag and store them in the refrigerator for 8–12 weeks. This cold period helps break the seed dormancy and encourages germination.
After stratification, the seeds are ready to be planted indoors.
Step 2: Choosing the Right Container
Choose a container that provides sufficient drainage. Small pots with drainage holes are ideal for starting saplings. Good drainage prevents waterlogging, which can lead to root rot—a common problem for indoor plants. Once the sapling grows, you can transplant it into a larger pot.
Step 3: Planting the Seeds or Saplings
For seeds:
- Fill the pot with well-draining potting soil, leaving about an inch of space from the top.
- Plant the seed about 1 inch deep into the soil.
- Lightly water the soil until it is damp but not soggy.
For young saplings:
- Dig a small hole in the potting soil large enough to accommodate the roots.
- Place the sapling gently into the hole.
- Cover the roots with soil and press lightly to remove air pockets.
- Water thoroughly but ensure excess water drains out.
Step 4: Providing Adequate Light
Cherry saplings require plenty of light to grow strong and healthy. Indoors, natural sunlight may be insufficient, especially during winter months. To supplement light:
- Place the pots near a south-facing window.
- Use grow lights for 12–16 hours per day to mimic sunlight.
Proper light exposure encourages photosynthesis, which is crucial for the sapling’s growth and eventual fruit production.
Step 5: Watering and Humidity
Maintaining consistent moisture is key. Young cherry saplings should be watered regularly, but overwatering can harm the roots. Use a spray bottle or watering can to keep the soil slightly damp. Tips for proper watering:
- Water when the top 1 inch of soil feels dry.
- Avoid letting water accumulate in the saucer under the pot.
- Mist the leaves occasionally to maintain humidity, especially in dry indoor conditions.
Step 6: Fertilizing Your Saplings
Fertilizer provides essential nutrients for growth. For cherry saplings, use a balanced, slow-release fertilizer suitable for fruiting trees. Start fertilizing after the first few leaves appear, and follow the instructions on the package. Avoid over-fertilizing, as it can damage the young roots and hinder development.
Step 7: Pruning and Training
Even indoor cherry saplings benefit from occasional pruning. Pruning encourages strong growth patterns and prevents the plant from becoming leggy. Tips for beginners:
- Remove any dead or yellowing leaves.
- Trim excessive growth to shape the sapling.
- Use small, clean pruning scissors to avoid damaging stems.
Additionally, for young trees, you can gently stake the sapling to provide support as the roots develop.
Step 8: Transplanting
As your cherry sapling grows, it will eventually outgrow its initial pot. Transplanting to a larger container ensures the roots have enough space to expand. Use a pot that is 2–3 inches larger in diameter than the current one and refresh the soil to provide fresh nutrients. Be gentle with the roots to avoid transplant shock.
Step 9: Monitoring for Pests and Diseases
Even indoors, cherry saplings can attract pests such as aphids or spider mites. Regularly inspect the leaves and stems. If you notice pests:
- Wash the leaves with a gentle water spray.
- Use organic insecticidal soap if the problem persists.
Diseases like powdery mildew or root rot can also affect indoor cherry saplings. Preventive measures include maintaining proper airflow, avoiding overwatering, and keeping the plant clean.
Step 10: Patience and Care
Cherry saplings require patience. Growth may be slow during the first few months, but consistent care pays off. Keep track of watering schedules, light exposure, and fertilization. Over time, your sapling will develop a strong root system, healthy foliage, and eventually, the potential to bloom and bear fruit—even indoors.
Advantages of Growing Cherry Saplings Indoors
Growing cherry saplings indoors offers several benefits for beginners:
- Controlled Environment: Protection from extreme weather and pests.
- Space Efficiency: Ideal for apartments or small spaces using containers.
- Learning Opportunity: Beginners can practice horticultural skills with minimal risk.
- Aesthetic Appeal: Cherry saplings add greenery and beauty to indoor spaces.
Common Challenges and Solutions
- Slow Germination: Cherry seeds may take weeks to sprout. Solution: Ensure proper stratification and maintain consistent warmth and moisture.
- Leggy Growth: Insufficient light can make the sapling stretch. Solution: Provide adequate grow lights or move the pot closer to sunlight.
- Overwatering: Can cause root rot. Solution: Allow soil to dry slightly between waterings and use pots with good drainage.
Conclusion
Growing cherry saplings indoors is not only achievable for beginners but also a highly rewarding experience. By following these simple techniques—selecting the right variety, preparing seeds properly, providing adequate light and water, fertilizing carefully, and monitoring for pests—you can nurture healthy cherry saplings right in your home. With patience and consistent care, these saplings can grow into beautiful trees that brighten your indoor space and eventually produce delightful cherries.
Whether you’re starting from seeds or young saplings, the key is attention to detail and persistence. Soon enough, your indoor cherry garden will thrive, providing both aesthetic joy and the satisfaction of cultivating life from a tiny seed into a flourishing tree.