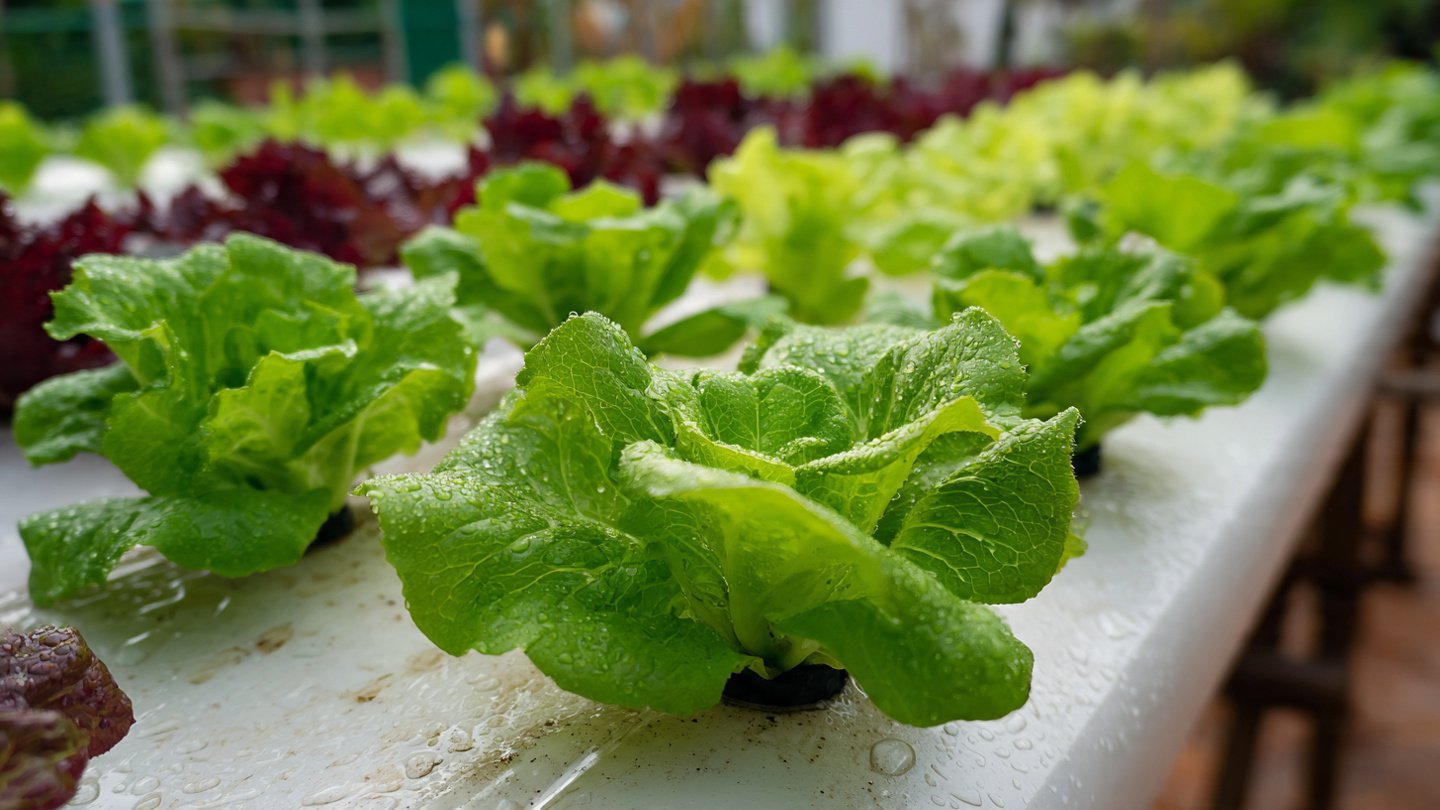
Growing fresh salad greens at home has never been easier thanks to hydroponics, a soil-free gardening method that allows plants to grow directly in nutrient-rich water. Hydroponic systems offer fast growth, higher yields, and minimal maintenance, making them perfect for urban gardeners, apartment dwellers, and anyone looking to enjoy crisp, nutritious greens year-round.
This guide explains a simple, step-by-step method to grow fresh salad greens at home using hydroponics, including materials, setup, planting, care, and harvesting tips.
Why Grow Salad Greens Hydroponically?
Hydroponic gardening offers several advantages over traditional soil-based growing:
- Faster Growth: Plants grow faster because nutrients are readily available in water.
- Space Efficiency: Ideal for small spaces, balconies, or kitchen counters.
- Water Conservation: Uses up to 90% less water than conventional gardening.
- Fewer Pests and Weeds: Soil-free growing reduces common garden problems.
- Continuous Harvest: With proper succession planting, you can enjoy fresh greens year-round.
Popular salad greens for hydroponic cultivation include lettuce, spinach, arugula, kale, and Swiss chard.
Materials Needed for Home Hydroponics
Setting up a simple hydroponic system requires minimal investment:
- Container or Tray: Shallow trays or buckets to hold water and plants.
- Growing Medium: Rockwool, coconut coir, perlite, or hydroponic sponges to support seedlings.
- Nutrient Solution: Hydroponic fertilizer providing essential macro and micronutrients.
- Water: Preferably filtered or dechlorinated.
- Net Pots or Seedling Holders: To suspend plants above the water.
- Light Source: Natural sunlight or LED grow lights for indoor setups.
- Air Pump (Optional): Provides oxygen to the roots for healthier growth.
These materials create a simple hydroponic system suitable for beginners.
Step 1: Germinating Seeds
Healthy seedlings are the foundation of lush hydroponic greens:
- Soak Seeds: Soak seeds in water for 6–12 hours to improve germination.
- Place in Growing Medium: Sow seeds in rockwool cubes, coir, or seed trays.
- Maintain Moisture: Keep the medium damp but not waterlogged.
- Provide Light: Once seeds sprout (usually in 2–5 days), place them under grow lights or near a sunny window.
Young seedlings should have strong, healthy roots before transplanting into your hydroponic system.
Step 2: Preparing the Hydroponic System
A simple home hydroponic system can be assembled as follows:
- Fill Container with Water: Ensure water covers the root zone but does not submerge the growing medium completely.
- Add Nutrient Solution: Mix hydroponic fertilizer according to manufacturer instructions. Proper pH levels (5.5–6.5) are essential for nutrient uptake.
- Place Seedlings in Net Pots: Suspend seedlings so roots reach the nutrient solution while leaves remain above water.
- Optional Aeration: Use an air pump to oxygenate the water, promoting faster, healthier root growth.
This simple setup allows your salad greens to absorb nutrients efficiently and grow quickly.
Step 3: Light Requirements
Salad greens require adequate light for photosynthesis and leaf development:
- Natural Sunlight: Place your system near a south-facing window for 4–6 hours of direct sunlight.
- Artificial Lighting: Use LED grow lights for 10–14 hours per day to ensure consistent growth, especially indoors or during winter months.
- Rotate Plants: For even growth, rotate trays or adjust light placement regularly.
Proper light ensures strong, crisp leaves and prevents leggy growth.
Step 4: Watering and Nutrient Management
Although hydroponic plants grow in water, monitoring moisture and nutrients is key:
- Check Water Levels Daily: Refill as necessary to maintain root contact with the nutrient solution.
- Maintain pH Levels: Use pH test kits to keep water between 5.5 and 6.5.
- Change Nutrient Solution: Refresh every 1–2 weeks to prevent nutrient imbalances.
- Avoid Waterlogging: Ensure roots have enough oxygen to prevent rot and support healthy growth.
Consistent monitoring helps produce thick, vibrant leaves.
Step 5: Maintaining Hydroponic Salad Greens
Proper care prolongs harvest and improves plant quality:
- Temperature: Maintain indoor temperatures between 65–75°F (18–24°C) for optimal growth.
- Humidity: Moderate humidity levels prevent fungal diseases.
- Pruning: Remove yellowing or damaged leaves to encourage new growth.
- Succession Planting: Stagger seed sowing every 1–2 weeks for continuous harvests.
A little attention ensures a steady supply of fresh greens.
Step 6: Harvesting Fresh Salad Greens
Hydroponic greens can be harvested in as little as 3–4 weeks depending on the variety:
- Cut-and-Come-Again Method: Trim outer leaves while leaving the center intact for regrowth.
- Full Harvest: For mature plants, cut leaves 1–2 inches above the base to encourage a second crop.
- Rinse Before Eating: Wash leaves thoroughly under clean water before use.
Regular harvesting encourages dense, lush growth and extends the life of your hydroponic greens.
Common Problems and Solutions
Even simple hydroponic systems may face challenges:
- Algae Growth: Keep the nutrient solution covered to reduce light exposure and clean trays regularly.
- Root Rot: Ensure proper aeration and avoid stagnant water.
- Nutrient Deficiencies: Adjust nutrient solution strength or change solution periodically.
- Pest Infestation: Use organic sprays or natural predators to control occasional pests.
Proactive monitoring ensures your salad greens remain healthy and productive.
Benefits of Hydroponic Salad Greens
- Faster Growth: Hydroponic plants mature faster than soil-grown counterparts.
- Year-Round Production: Grow fresh greens regardless of season or outdoor conditions.
- Better Nutrition: Controlled nutrient solutions enhance vitamin and mineral content.
- Space Efficiency: Ideal for urban or indoor gardening.
- Minimal Soil Maintenance: No weeding, tilling, or soil preparation required.
Hydroponics combines convenience, efficiency, and sustainability for modern home gardeners.
Tips for Maximum Yield
- Use High-Quality Seeds: Ensures high germination and healthy growth.
- Monitor pH and Nutrient Levels: Regularly check water to avoid deficiencies or imbalances.
- Provide Adequate Light: Prevents leggy growth and encourages thick, crisp leaves.
- Practice Cut-and-Come-Again: Extends harvesting and maximizes yield.
- Maintain Clean Equipment: Reduces risk of disease and algae growth.
Following these tips ensures a consistent, nutritious supply of salad greens from your hydroponic system.
Culinary Uses
Hydroponic salad greens are versatile in the kitchen:
- Fresh Salads: Lettuce, spinach, and arugula can be used raw.
- Smoothies and Juices: Boost nutrition with fresh greens in blended drinks.
- Sandwiches and Wraps: Crisp leaves add texture and flavor.
- Cooking: Lightly sauté or add to soups for vitamins and minerals.
With hydroponics, you can enjoy greens at peak freshness and flavor.
Final Thoughts
Growing fresh salad greens using hydroponics at home is easy, space-efficient, and highly rewarding. By following these steps—selecting quality seeds, germinating properly, setting up a simple hydroponic system, providing light and nutrients, and harvesting correctly—you can enjoy nutrient-packed, crisp salad greens year-round.
Whether you live in an apartment, have a small balcony, or just want fresh greens on your kitchen counter, hydroponics offers a sustainable, efficient, and fun way to grow your own food.