Okra, also known as lady’s finger, is a nutritious and versatile vegetable widely grown in home gardens. While traditional okra plants can grow tall and require ample space, dwarf okra varieties are compact, fast-growing, and ideal for small spaces, patios, or balcony gardens. Growing dwarf okra in containers allows urban gardeners and those with limited outdoor space to enjoy fresh, tender pods throughout the growing season. This guide provides step-by-step instructions for successfully cultivating dwarf okra in containers, from selecting seeds to harvesting pods.
Why Choose Dwarf Okra for Container Gardening
Dwarf okra varieties are specifically bred to remain compact while producing abundant pods. Unlike taller okra plants, dwarf types rarely exceed 2–3 feet in height, making them perfect for containers or small garden plots. Key advantages of dwarf okra include:
- Space-efficient growth suitable for patios, balconies, and small yards
- Early maturation, allowing multiple harvests in one season
- High yield despite compact size
- Easy maintenance compared to traditional tall varieties
With these traits, dwarf okra is ideal for gardeners who want fresh vegetables but lack large garden space.
Selecting the Right Container
The success of container-grown okra largely depends on the pot size and drainage.
Container Guidelines:
- Minimum pot depth: 12–14 inches
- Minimum width: 12 inches for a single plant
- Ensure multiple drainage holes to prevent waterlogging
- Materials: plastic, ceramic, or terracotta pots are suitable
A slightly root-bound environment encourages flowering and pod production in dwarf okra, so avoid overly large pots.
Choosing the Best Soil Mix
Dwarf okra thrives in fertile, well-draining soil that supports healthy root development.
Ideal Soil Composition:
- 2 parts garden soil or potting mix
- 1 part compost or well-rotted organic matter
- 1 part coarse sand or perlite to improve drainage
This mix ensures the roots receive enough nutrients while preventing stagnation or rot. Slightly acidic to neutral soil pH (6.0–7.0) works best.
Selecting High-Quality Seeds
The first step in growing dwarf okra successfully is choosing quality seeds.
Seed Selection Tips:
- Opt for certified dwarf okra seeds from a trusted supplier
- Select early-maturing varieties for multiple harvests
- Avoid damaged or old seeds for better germination rates
Popular dwarf okra varieties include “Clemson Spineless Dwarf,” “Baby Star,” and “Little Finger,” which are known for compact growth and tender pods.
Sowing Seeds in Containers
Planting seeds properly ensures strong, healthy seedlings.
Step-by-Step Sowing:
- Fill the container with the prepared soil mix, leaving 1–2 inches at the top
- Sow 2–3 seeds per container, about ½ inch deep
- Cover lightly with soil and water gently
- Keep the soil consistently moist until germination, which usually occurs in 5–10 days
Once seedlings reach 3–4 inches in height, thin them to a single, strongest plant per container to prevent overcrowding.
Sunlight Requirements
Okra is a sun-loving plant, and dwarf varieties are no exception.
Light Guidelines:
- Provide 6–8 hours of direct sunlight daily
- In extremely hot climates, afternoon shade can prevent leaf scorch
- Rotate containers occasionally to ensure even growth
Adequate sunlight promotes strong stems, vibrant foliage, and abundant flowering.
Watering Your Dwarf Okra
Proper watering is critical for container-grown okra to avoid stress and improve yield.
Watering Tips:
- Water deeply when the top inch of soil dries
- Avoid waterlogging, which can lead to root rot
- During flowering and pod development, maintain consistent moisture
Mulching around the base with straw or dried leaves helps retain soil moisture and regulate temperature.
Fertilization for Maximum Yield
Container-grown okra requires regular feeding to maintain growth and produce abundant pods.
Fertilizer Recommendations:
- Use a balanced, slow-release fertilizer at planting
- Supplement with liquid fertilizer every 2–3 weeks during the growing season
- Avoid excessive nitrogen, which promotes leafy growth at the expense of flowers and pods
Organic options like vermicompost or compost tea provide essential nutrients and improve soil structure.
Supporting and Pruning Dwarf Okra
While dwarf okra is compact, light support may help the plant during heavy flowering.
Tips for Support:
- Use small stakes if the plant becomes top-heavy
- Tie the stems loosely to prevent bending
Pruning is usually minimal, but removing dead or yellow leaves keeps the plant healthy and allows energy to focus on pod production.
Pest and Disease Management
Dwarf okra in containers is generally less prone to pests, but occasional problems may arise.
Common Pests:
- Aphids, whiteflies, and mites
- Caterpillars or pod borers
Disease Prevention:
- Maintain good airflow around the plant
- Avoid overhead watering to reduce fungal problems
- Use organic pesticides like neem oil if necessary
Regular monitoring ensures healthy plants and maximizes pod yield.
Flowering and Pollination
Dwarf okra produces yellow flowers that develop into tender pods.
Flowering Tips:
- Ensure consistent watering and sunlight to encourage flowers
- Pollination is usually carried out by bees or wind
- In container settings, gentle hand-pollination can improve pod set
Healthy flowering directly translates to better pod production.
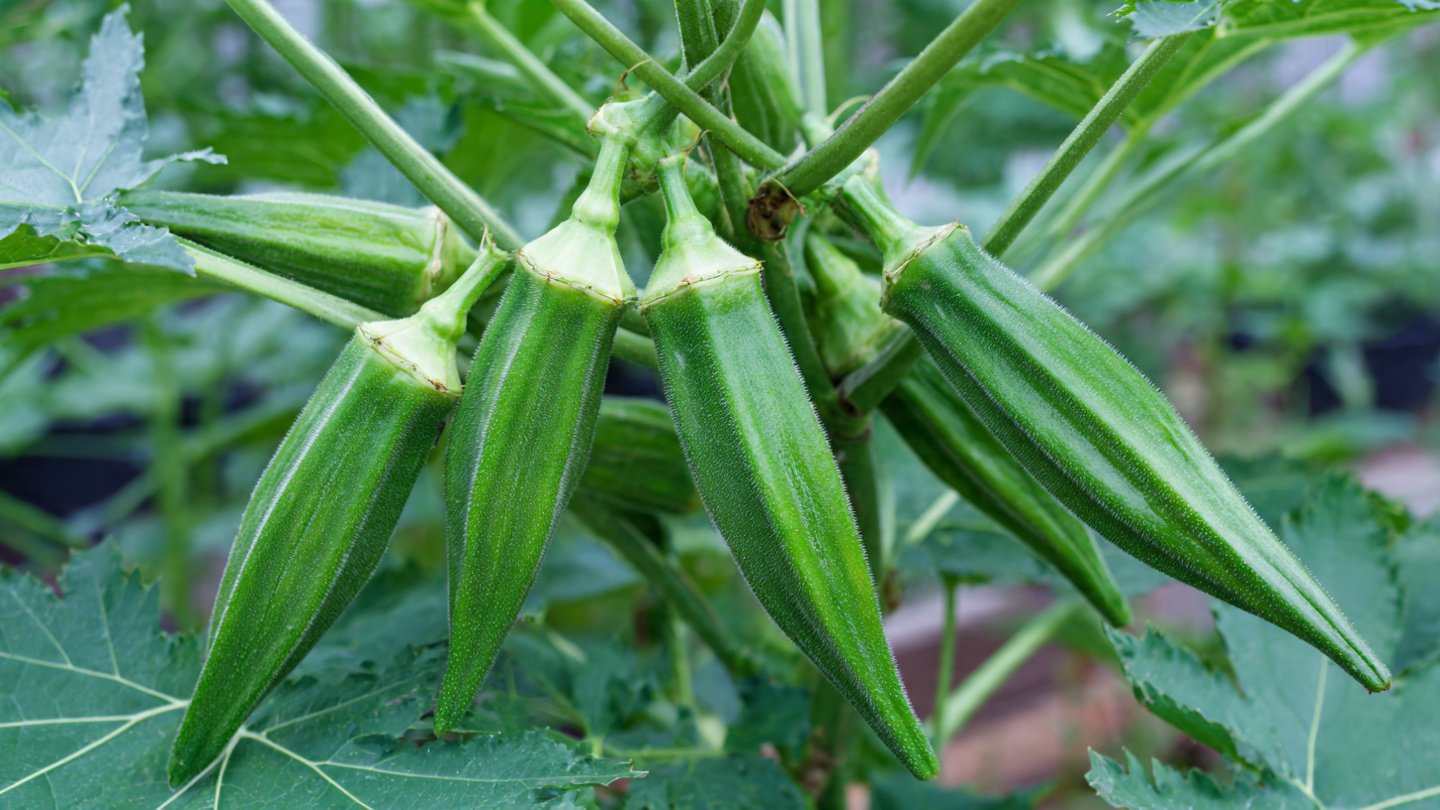
Harvesting Dwarf Okra Pods
Proper harvesting ensures tender pods and encourages continuous growth.
Harvest Guidelines:
- Pick pods when they are 3–5 inches long and still tender
- Use scissors or a sharp knife to cut pods, avoiding damage to the plant
- Harvest every 2–3 days during peak production
Regular harvesting prevents pods from becoming tough or fibrous and encourages the plant to produce more.
Seasonal Care for Year-Round Success
Summer:
- Ensure adequate sunlight and consistent moisture
- Mulch heavily to prevent soil from drying out
Monsoon/Rainy Season:
- Protect containers from heavy rainfall
- Maintain drainage to prevent waterlogging
Winter:
- Move containers indoors or to a sunny, protected location if frost occurs
- Reduce watering but continue feeding lightly
Adjusting care according to the season ensures continuous growth and productivity.
Common Mistakes to Avoid
- Planting in containers that are too small
- Overwatering, leading to root rot
- Using poor-quality seeds
- Ignoring harvesting frequency, resulting in tough pods
Avoiding these mistakes helps ensure a high yield of tender, delicious okra pods.
Benefits of Growing Dwarf Okra in Containers
- Fresh, tender pods even in small spaces
- Continuous harvest with early-maturing varieties
- Compact growth ideal for balconies, terraces, and patios
- Reduces dependency on store-bought vegetables
- Encourages urban gardeners to grow nutritious produce
Container-grown dwarf okra makes gardening accessible for those with limited outdoor space while providing flavorful, healthy vegetables.
Final Thoughts
Growing dwarf okra in containers is a practical and rewarding way to enjoy fresh, tender pods, even in limited spaces. By selecting the right seeds, preparing nutrient-rich soil, providing adequate sunlight, watering carefully, and harvesting regularly, gardeners can achieve abundant yields from small containers. With minimal maintenance, dwarf okra offers continuous harvests, vibrant green foliage, and delicious pods that enhance salads, stir-fries, and curries. This compact yet productive vegetable is perfect for urban gardeners, balcony growers, and anyone looking to maximize their garden’s potential in a small area.