Croton plants, with their strikingly vibrant foliage in shades of red, yellow, green, and orange, are a favorite among gardeners looking to add a splash of color to indoor and outdoor spaces. Known for their hardy nature and bold leaf patterns, crotons are not only visually appealing but also relatively easy to propagate. Whether you want to expand your existing collection or gift plants to friends and family, multiplying crotons at home can be done efficiently with minimal effort using simple techniques. This guide provides a detailed, step-by-step approach to propagating croton plants for a thriving, colorful garden.
Understanding Croton Plants
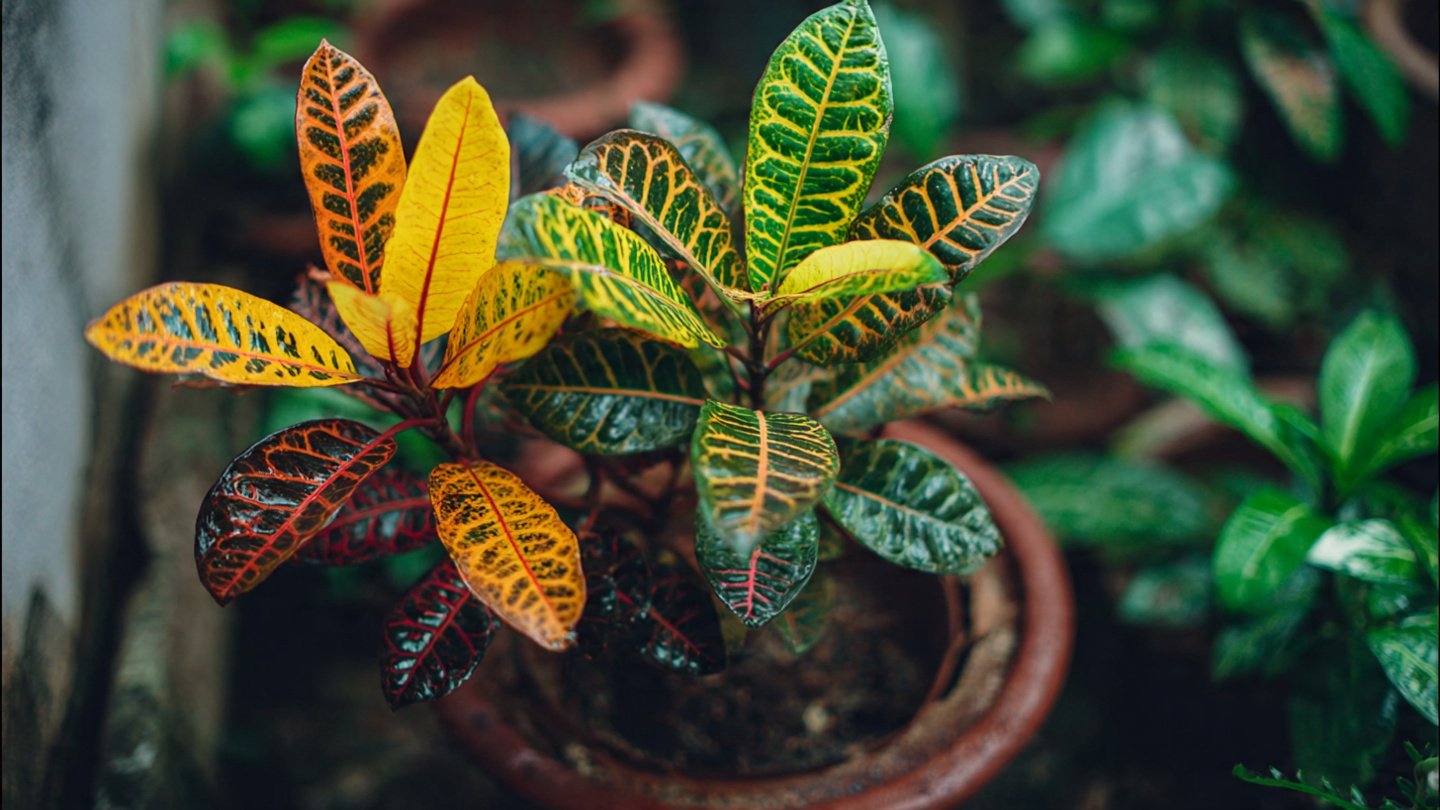
Crotons (Codiaeum variegatum) are tropical evergreen shrubs native to Southeast Asia and the Pacific Islands. They are appreciated for their bright, variegated leaves, which can vary in shape and size depending on the variety. Crotons grow best in warm, humid conditions with plenty of sunlight, which enhances their vivid leaf colors.
These plants can reach heights of up to 3 meters in outdoor gardens, but are often kept smaller indoors or in containers. Understanding their growth habits helps ensure successful propagation and healthy development of new plants.
Why Propagate Crotons at Home
Multiplying crotons at home offers several benefits:
- Cost-Effective: Propagation allows you to grow new plants without purchasing additional ones from nurseries.
- Preserve Varieties: Crotons come in numerous cultivars with unique leaf patterns; propagation helps maintain these distinct traits.
- Gift and Share: New plants make excellent gifts for friends and family.
- Enhance Garden Aesthetics: More plants create a fuller, vibrant landscape, indoors or outdoors.
Methods of Croton Propagation
Crotons are primarily propagated through stem cuttings. This method is simple, reliable, and requires minimal equipment, making it ideal for home gardeners. While propagation through seeds is possible, it is less common because it takes longer for seedlings to develop and may not retain the parent plant’s exact leaf patterns.
Step-by-Step Guide to Propagating Crotons from Stem Cuttings
1. Select Healthy Parent Plants
Choose a mature, healthy croton plant with strong stems and vibrant leaves. Avoid using plants that show signs of pests, disease, or stress, as this can reduce the success rate of propagation.
2. Take the Right Cuttings
- Cut 4–6 inch sections from healthy, semi-woody stems.
- Ensure each cutting has at least 3–4 leaves for photosynthesis.
- Make a clean cut using a sharp, sterilized knife or pruning shears to prevent infection.
3. Prepare the Cuttings
- Remove lower leaves from the cutting, leaving 1–2 leaves at the top. This reduces water loss and encourages root growth.
- Optional: Dip the cut end in rooting hormone to enhance the chances of successful rooting. Rooting hormones can stimulate faster root development but are not strictly necessary.
4. Choose the Right Growing Medium
Croton cuttings root best in a well-draining medium that retains moisture without becoming waterlogged. Common options include:
- A mix of sand and peat moss
- Perlite and coconut coir
- Well-draining potting soil
Fill a small pot with the chosen medium, moisten it lightly, and make a small hole for the cutting.
5. Plant the Cuttings
- Insert the cut end of the stem about 2–3 inches deep into the growing medium.
- Firm the soil gently around the cutting to ensure it stands upright.
6. Provide Optimal Conditions for Rooting
- Humidity: Cover the cutting with a plastic bag or place it in a mini greenhouse to maintain high humidity. Avoid letting the plastic touch the leaves.
- Light: Place cuttings in bright, indirect sunlight. Direct sunlight can scorch tender cuttings, while too little light can slow root formation.
- Temperature: Keep the environment warm, ideally between 20–30°C.
7. Watering
- Keep the growing medium consistently moist but not soggy.
- Mist the cuttings lightly every few days to maintain humidity.
8. Patience and Monitoring
- Rooting usually occurs within 4–6 weeks.
- Gently tug on the cutting to check for resistance, which indicates root development.
- Remove any leaves that turn yellow or wilt to prevent disease.
9. Transplanting
Once roots are well-established, usually after 6–8 weeks, transplant the new croton plant into a larger pot or garden bed. Use well-draining soil enriched with organic compost to support healthy growth.
Tips to Improve Propagation Success
- Use Semi-Wooded Stems: Stems that are neither too young nor too old root faster and have higher survival rates.
- Avoid Overwatering: Excess moisture can cause cuttings to rot before rooting.
- Maintain Warmth and Humidity: Crotons thrive in tropical conditions, and consistent warmth and humidity significantly improve rooting success.
- Prune Sparingly: Once rooted, prune selectively to encourage bushy growth and vibrant foliage.
Caring for Newly Propagated Crotons
After successful propagation, young crotons require gentle care:
- Light: Gradually acclimate them to brighter conditions. Too much direct sunlight initially can stress the plants.
- Watering: Maintain consistent moisture without waterlogging.
- Fertilization: Apply a balanced liquid fertilizer once every 3–4 weeks to support healthy growth.
- Pest Control: Monitor for pests like spider mites and mealybugs, which can target young plants.
Common Mistakes to Avoid
- Using Weak Cuttings: Always select healthy, strong stems to ensure a higher rooting rate.
- Excessive Watering: Waterlogged soil can cause root rot and reduce survival chances.
- Direct Sunlight on Cuttings: Intense sunlight can dry out leaves and slow rooting.
- Neglecting Humidity: Low humidity can cause leaves to wilt and cuttings to fail.
Advantages of Multiplying Crotons at Home
- Affordable Garden Expansion: Multiply your collection without buying new plants.
- Control Over Quality: Ensure healthy, disease-free plants by starting your own cuttings.
- Personalized Design: Arrange multiple new plants to create colorful indoor or outdoor displays.
Creative Ways to Use Newly Propagated Crotons
- Indoor Décor: Use vibrant crotons in pots to brighten living rooms, hallways, or balconies.
- Outdoor Mass Plantings: Create colorful borders, edging, or patterns in garden beds.
- Gift Plants: Share rooted crotons with friends and family as living gifts.
- Mixed Garden Displays: Combine different croton varieties to achieve multi-colored, eye-catching designs.
Conclusion
Multiplying croton plants at home is a simple, rewarding process that allows gardeners to expand their colorful plant collections with minimal effort. By following the steps of selecting healthy stems, preparing the cuttings, providing proper soil, humidity, and light, you can successfully root new crotons within weeks. With consistent care, these propagated plants will grow into vibrant, bushy specimens that enhance both indoor and outdoor garden spaces. Whether used for mass displays, borders, or decorative indoor arrangements, home-propagated crotons are a cost-effective way to bring tropical beauty and lasting color into your living environment.