Kale is one of the healthiest leafy greens you can grow, and the good news is you don’t need a garden bed, fancy containers, or expensive supplies to grow it successfully. With a little creativity, you can grow fresh, nutritious kale right at home using something you probably throw away every week—a plastic bottle. This upcycled method is perfect for small spaces, balconies, patios, and even sunny windowsills.
In this guide, you’ll learn great tips for growing kale in a plastic bottle, from preparation to harvest, so you can enjoy homegrown greens while reducing waste and saving money.
Why Grow Kale in a Plastic Bottle?
Plastic bottle gardening isn’t just a trend—it’s a practical, eco-friendly solution for modern gardeners.
Benefits of Bottle Gardening
- Reuses waste plastic instead of discarding it
- Ideal for small homes and apartments
- Easy to move and manage
- Affordable and beginner-friendly
- Great for teaching kids about gardening
Kale is especially well suited for container growing because it has shallow roots and adapts easily to limited space.
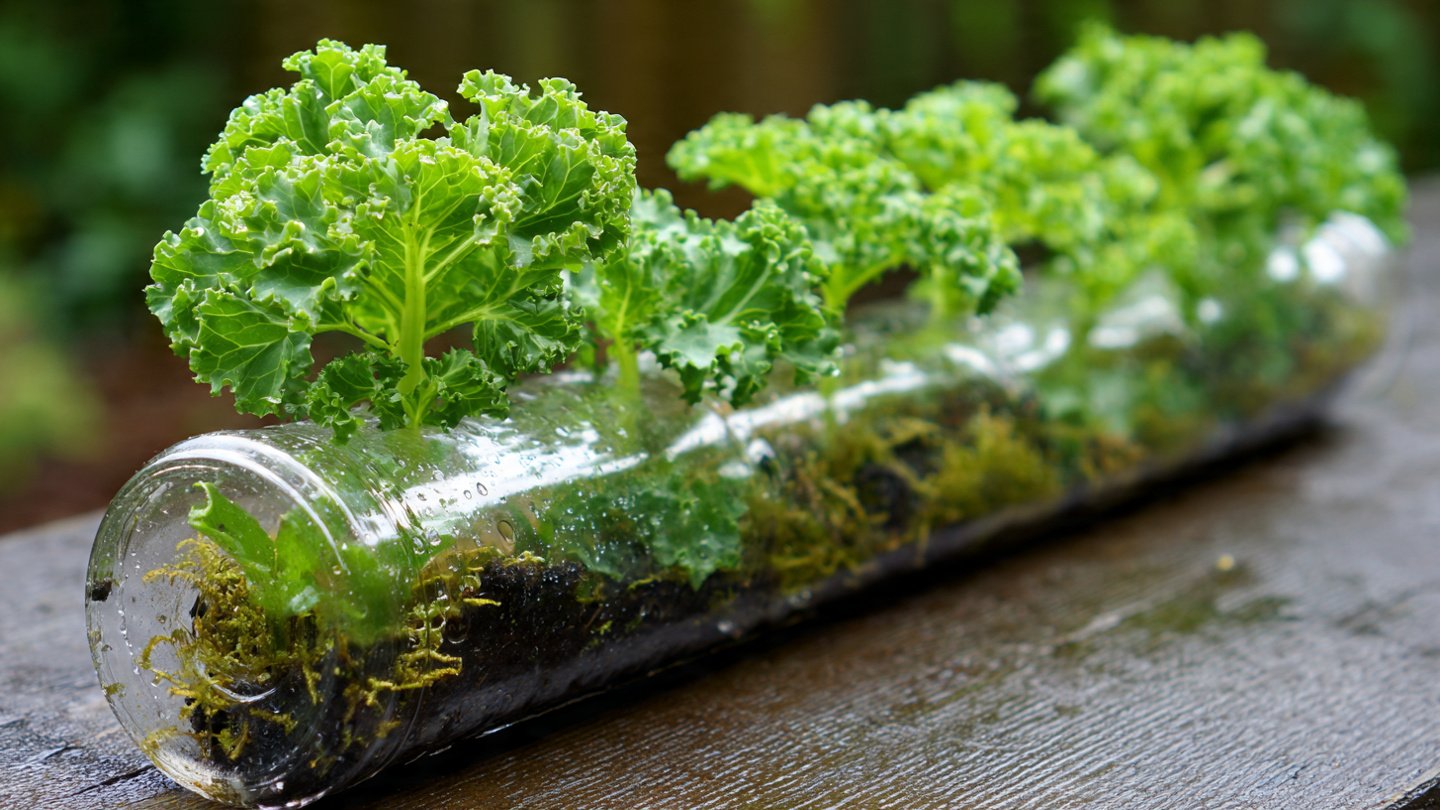
Choosing the Right Plastic Bottle
Not all bottles are equal when it comes to growing vegetables.
Best Bottle Options
- 1.5–2 liter water or soda bottles
- Thick, sturdy plastic for durability
- Clear bottles (can be wrapped to block light from roots)
Avoid bottles that once held chemicals or cleaning products, as residue can harm plants.
How to Prepare the Plastic Bottle for Kale
Preparing your bottle properly ensures good drainage, healthy roots, and strong growth.
Step-by-Step Preparation
- Wash the bottle thoroughly
- Cut the bottle horizontally or vertically
- Poke 3–5 small drainage holes at the bottom
- Optional: Wrap the outside with paper or cloth to protect roots from sunlight
Drainage is essential—without it, kale roots may rot.
Choosing the Right Kale Variety for Bottles
Some kale varieties perform better in containers than others.
Best Kale Types for Bottle Growing
- Dwarf kale
- Curly kale
- Baby leaf kale
- Red Russian kale
These varieties grow compactly and allow repeated harvesting without overwhelming the container.
Soil Mix That Helps Kale Thrive
Healthy soil is the foundation of strong kale plants.
Ideal Soil Mix
- 50% garden soil or potting soil
- 30% compost or vermicompost
- 20% coco peat or sand for drainage
This mix provides nutrients while keeping the soil light and airy—perfect for container growth.
Planting Kale Seeds or Seedlings
You can grow kale from seeds or transplants, but seeds are often easier and cheaper.
How to Plant Kale Seeds
- Fill the bottle with soil, leaving 2 inches at the top
- Plant seeds ¼ inch deep
- Water gently
- Place in a sunny location
Seeds typically germinate within 5–10 days.
If planting seedlings, plant only one per bottle to prevent overcrowding.
Sunlight Requirements for Bottle-Grown Kale
Kale loves sunlight but tolerates partial shade.
Light Guidelines
- 4–6 hours of sunlight daily
- Morning sun is ideal
- Protect from extreme afternoon heat
If growing indoors, place bottles near a bright window or balcony door.
Watering Tips for Kale in Plastic Bottles
Plastic bottles dry out faster than garden beds, so proper watering is essential.
Smart Watering Tips
- Water when the top inch of soil feels dry
- Avoid overwatering
- Ensure excess water drains freely
Consistent moisture helps kale produce tender, flavorful leaves.
Feeding Kale for Faster Growth
Kale is a leafy green, which means it benefits from regular feeding.
Easy Organic Feeding Options
- Liquid compost tea every 10–14 days
- Diluted vermicompost slurry
- Mild organic liquid fertilizer
Avoid overfeeding—too much fertilizer can cause bitter leaves.
Managing Pests Naturally
Even container kale can attract pests.
Common Kale Pests
- Aphids
- Caterpillars
- Leaf miners
Natural Solutions
- Neem oil spray once a week
- Hand-remove visible pests
- Keep plants well-ventilated
Healthy plants are naturally more pest-resistant.
Harvesting Kale the Right Way
One of the best things about kale is that it keeps producing when harvested properly.
How to Harvest
- Start harvesting when leaves are 6–8 inches long
- Cut outer leaves first
- Leave the center growth intact
This “cut-and-come-again” method allows continuous harvest for weeks or even months.
How Long Does Kale Grow in a Bottle?
Kale grows surprisingly well in containers.
Growth Timeline
- Germination: 5–10 days
- First harvest: 30–40 days
- Continuous harvest: 2–3 months
With good care, a single bottle can provide multiple harvests.
Common Mistakes to Avoid
Avoiding these errors will dramatically improve your success.
- Overcrowding plants
- Poor drainage
- Too little sunlight
- Overwatering
- Skipping regular harvesting
Fixing even one of these can boost growth noticeably.
Why Plastic Bottle Kale Is Perfect for Beginners
If you’re new to gardening, bottle-grown kale is an excellent starting point.
- Minimal investment
- Quick results
- Easy maintenance
- Encourages sustainable habits
It’s a small step toward food self-sufficiency and greener living.
Final Thoughts: Grow More Greens with Less Waste
Growing kale in a plastic bottle proves that gardening doesn’t need land, money, or complicated tools. With a recycled bottle, good soil, and basic care, you can enjoy fresh, nutrient-packed greens right from your home.
This simple upcycling method not only saves space and reduces plastic waste but also rewards you with healthy food and the satisfaction of growing it yourself. Once you try it, you may never look at an empty plastic bottle the same way again.