Peas are one of the first vegetables to welcome spring in home gardens, offering fresh, sweet pods that are rich in vitamins, minerals, and fiber. Growing early spring peas naturally not only ensures chemical-free, nutritious produce but also supports healthy soil ecosystems and attracts beneficial insects. With the right techniques, gardeners can enjoy an abundant, vibrant crop of peas that thrives in cool early-season conditions.
This guide provides a comprehensive step-by-step approach to cultivating early spring peas naturally, covering everything from seed selection and soil preparation to planting, care, pest management, and harvesting.
Understanding Early Spring Peas
Peas (Pisum sativum) are cool-season legumes that grow best in temperatures between 10°C and 18°C (50–65°F). Early spring varieties, such as sugar snap peas, snow peas, and garden peas, are harvested before the onset of warmer weather, which can cause pods to become starchy or flowers to drop.
Peas are nitrogen-fixing plants, meaning they improve soil fertility by enriching it with nitrogen through symbiotic bacteria in their root nodules. This natural benefit makes peas ideal for organic gardens and companion planting with crops like carrots, radishes, and leafy greens.
Choosing the Right Pea Varieties
Selecting the right variety is critical for early spring success:
- Sugar Snap Peas: Crisp, edible pods with a sweet flavor. Ideal for fresh eating and stir-frying.
- Snow Peas: Flat, tender pods that are excellent raw or lightly cooked.
- Early Garden Peas: Classic shelling peas that mature quickly and produce abundant pods.
Choose varieties labeled for early spring or short-season growth, as these are bred to germinate quickly in cool soil.
Preparing the Soil Naturally
Healthy soil is the foundation for a perfect pea crop. Peas thrive in fertile, well-draining soil with a neutral to slightly alkaline pH (6.0–7.5). Natural soil preparation techniques include:
- Adding Organic Matter: Incorporate compost, well-rotted manure, or leaf mold to improve soil fertility and structure.
- Mulching: Apply a 2–3 inch layer of straw, shredded leaves, or grass clippings to retain moisture, regulate soil temperature, and prevent weed growth.
- Nitrogen Management: Although peas fix nitrogen themselves, a light sprinkle of compost tea or organic fertilizer at planting can boost early growth.
- Soil Aeration: Gently loosen soil to a depth of 8–12 inches to promote strong root development.
Avoid chemical fertilizers or synthetic soil amendments to maintain a fully natural growing environment.
Selecting and Preparing Seeds
Using high-quality seeds ensures healthy seedlings and vigorous growth:
- Seed Selection: Choose certified organic seeds for early spring planting. Avoid seeds treated with chemicals or fungicides.
- Pre-Soaking: Soak seeds in water for 8–12 hours before planting. This softens the seed coat, accelerates germination, and helps seeds sprout faster in cool soil.
- Inoculation (Optional): Applying rhizobium inoculant powder to seeds can enhance nitrogen-fixing capacity and improve plant health.
Pre-soaking and inoculation are simple, natural steps that significantly increase germination success.
Planting Early Spring Peas
Timing and planting technique are crucial for early-season success:
- Timing: Sow seeds 2–4 weeks before the last expected frost, as peas tolerate light frost but prefer cool soil.
- Depth: Plant seeds 1–1.5 inches deep. Planting too shallow can expose seeds to temperature fluctuations, while too deep can delay sprouting.
- Spacing: Space seeds 2–3 inches apart in rows 18–24 inches apart to allow airflow, reduce disease risk, and accommodate vine growth.
- Support: For climbing varieties, install natural trellises, bamboo stakes, or twig frames to support vines and maximize air circulation.
For a continuous harvest, consider successive planting every 1–2 weeks until mid-spring.
Watering and Mulching for Natural Growth
Consistent moisture is vital for peas, especially during germination and flowering:
- Watering: Keep soil evenly moist but not waterlogged. Water deeply once or twice a week, depending on rainfall and soil type.
- Mulching: Maintain a mulch layer around plants to conserve moisture, prevent soil temperature fluctuations, and suppress weeds. Organic mulch also enriches soil as it decomposes.
Natural watering practices encourage healthy root development and reduce the risk of fungal diseases.
Fertilizing Naturally
Early spring peas generally require minimal fertilizer, as they fix their own nitrogen. However, natural supplements can boost growth and yield:
- Compost Tea: Apply a diluted compost tea every 2–3 weeks to provide nutrients and beneficial microorganisms.
- Seaweed Extract: Liquid seaweed promotes strong roots, vibrant foliage, and resilience against stress.
- Avoid Excess Nitrogen: Too much nitrogen encourages leafy growth but reduces flower and pod production.
Natural fertilizers support vigorous growth without compromising the organic integrity of your crop.
Pest and Disease Management Naturally
Peas can be affected by aphids, slugs, and fungal diseases, but natural methods are effective:
- Beneficial Insects: Introduce ladybugs, lacewings, and parasitic wasps to control aphids naturally.
- Companion Plants: Plant garlic, onions, or marigolds nearby to repel pests.
- Physical Barriers: Use row covers or fine mesh to prevent insect damage.
- Fungal Control: Ensure good spacing and trellis support to improve airflow, reduce leaf wetness, and prevent mildew or rot.
- Manual Removal: Handpick slugs or pests if infestation is minor.
Maintaining healthy soil, proper spacing, and supportive structures minimizes pest and disease issues naturally.
Encouraging Continuous Flowering and Pod Production
Early spring peas can produce abundant pods with proper care:
- Regular Harvesting: Pick mature pods frequently to encourage new pod production.
- Support: Keep vines off the ground to prevent rot and improve air circulation.
- Pruning (Optional): Remove damaged or yellowing foliage to maintain plant energy and encourage further flowering.
A well-maintained crop of peas can continue producing for several weeks, providing fresh harvests throughout early spring.
Companion Planting and Garden Benefits
Peas are excellent companion plants in natural gardens:
- Soil Enrichment: Nitrogen fixation benefits neighboring plants like carrots, radishes, and leafy greens.
- Pollinator Attraction: Pea flowers attract bees and beneficial insects, supporting biodiversity.
- Natural Trellising: Plant peas near other climbing crops, like beans, to optimize vertical space.
Integrating peas naturally into your garden improves overall soil health, supports pollinators, and maximizes productivity.
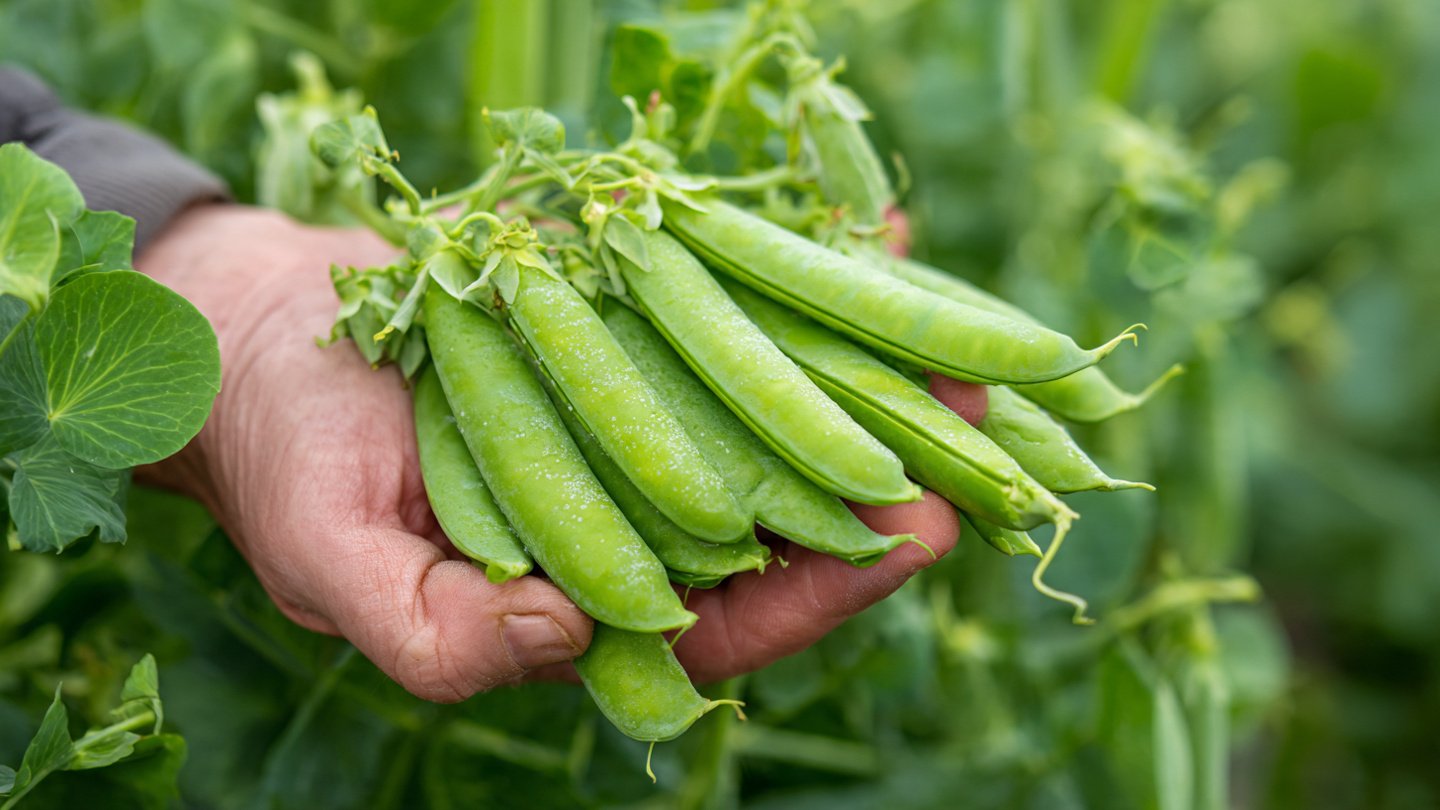
Harvesting Early Spring Peas
Harvesting at the right time ensures maximum sweetness and quality:
- Timing: Pick pods when they are firm, plump, and before seeds inside become too large.
- Method: Gently pinch or cut pods to avoid damaging vines.
- Frequency: Check plants every 2–3 days, as pods mature quickly in early spring conditions.
Prompt and regular harvesting encourages continuous production and ensures the best flavor.
Conclusion
Growing early spring peas naturally is a rewarding and environmentally friendly way to enjoy fresh, sweet vegetables. By choosing the right variety, preparing fertile soil, pre-soaking seeds, providing support, watering consistently, and managing pests and diseases naturally, gardeners can cultivate a thriving pea crop without chemicals.
With care and attention, your early spring peas will provide a bountiful harvest, improve soil health, attract beneficial insects, and enhance the beauty of your garden. Cultivating peas naturally is not only a path to delicious, healthy food but also a sustainable and eco-friendly approach to gardening.